We were in Bunclody and Enniscorthy this weekend and had 4 well attended workshops (somewhere between 60 and 70 participants in all). I was too busy to take photos but Shannon Chance managed to snap a few which are linked below
Uncategorized
BBG 2018 first day

We had two workshops in Gorey Library (Wexford, Ireland) on Friday 10th of August. In total there were 35 attendees spread across the morning and afternoon. Happily no components were forgotten and apart from one or two malfunctioning STM32 “Blue pill” boards, all went well. We got great feedback from the library staff, parents and children.
The library’s Facebook post regarding the event is here
Breadboard Games 2018 starts tomorrow
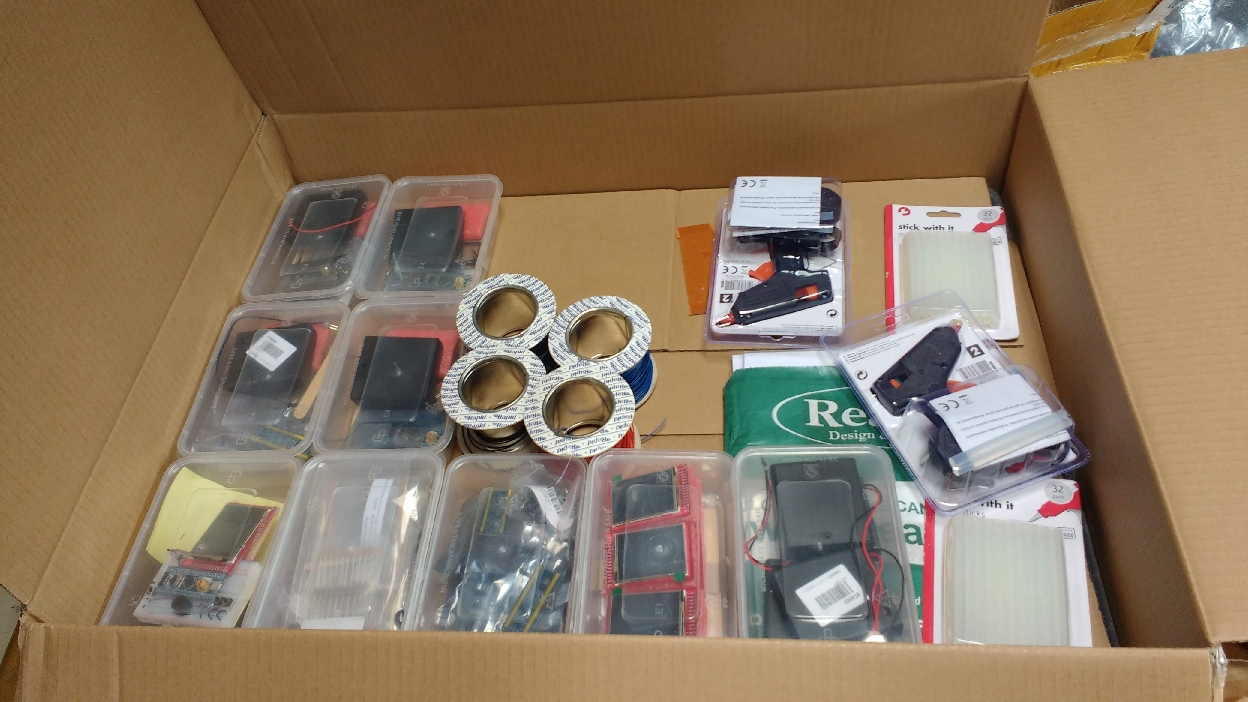
Just packed up 40 BBG2018 kits for 2 workshops tomorrow. This year there will be 10 events scattered across Wexford with 20 participants at each one. The usual RoboSlam crew (Ted, Damon, Charlie, Shannon, Richard, Sam) will be helping out over the course of the next few weekends. Further details are over at https://ioprog.com/breadboard-games-2018/
Nearly ready for Dublin Maker 2018


Putting the (hopefully) final touches to the paper based programming demos for Dublin Maker 2018 (July 21st, Merrion Square).
There are two demos here. The first controls a robot arm that can retrieve a sweet for the user. The user “programs” the arm by colouring in bits on the paper roll. Each column of the paper roll corresponds to an 8 bit opcode. The two MSB’s select which of the servo motors is to be controlled, the remaining 6 bits determine the angle.
The second demo is a music box similar in design to the first except that the opcodes are 15 bits long. 12 of these select the note, 2 select the octave and the 15th bit is a clock bit that allows the microcontroller control the motor speed. Fingers crossed these will work on the day 🙂
Breaboard Games 2018
Following on from last years successful day in Bunclody there will be 5 days of BBG in August this year scattered across various libraries in Co. Wexford. This year the hardware is the same as last – subject to random changes in the display sent by the supplier :). The software has moved on a bit however and the system can now use the touch screen to allow users edit sprites.

Apart from the addition of the edit function, the software has been refactored internally to (hopefully) allow for greater community involvement and to ease the transition between different screen types.
Full parts lists, schematics and source code will follow in July after a little more polishing.
Using Flash memory on the STM32F103
Some microcontrollers have a dedicated Non-Volatile-Memory (NVM) bank for storing calibration data, program settings and so on. The STM32F103C8T6 does not have NVM like this but it’s Flash program memory can be used with care for the same purpose. The Flash memory in this chip is divided into 1kiB sectors and there are 64 if them (0 to 63). The code to erase, write and read a sector is shown below:
int  writeSector(uint32_t Address,void * values, uint16_t size)
{
    uint16_t *AddressPtr;
    uint16_t *valuePtr;
    AddressPtr = (uint16_t *)Address;
    valuePtr=(uint16_t *)values;
    size = size / 2;  // incoming value is expressed in bytes, not 16 bit words
    while(size) {
        // unlock the flash
        // Key 1 : 0x45670123
        // Key 2 : 0xCDEF89AB
        FLASH->KEYR = 0x45670123;
        FLASH->KEYR = 0xCDEF89AB;
        FLASH->CR &= ~BIT1; // ensure PER is low
        FLASH->CR |= BIT0;  // set the PG bit
        *(AddressPtr) = *(valuePtr);
        while(FLASH->SR & BIT0); // wait while busy
        if (FLASH->SR & BIT2)
            return -1; // flash not erased to begin with
        if (FLASH->SR & BIT4)
            return -2; // write protect error
        AddressPtr++;
        valuePtr++;
        size--;
    }
    return 0;
}
void eraseSector(uint32_t SectorStartAddress)
{
    FLASH->KEYR = 0x45670123;
    FLASH->KEYR = 0xCDEF89AB;
    FLASH->CR &= ~BIT0;  // Ensure PG bit is low
    FLASH->CR |= BIT1; // set the PER bit
    FLASH->AR = SectorStartAddress;
    FLASH->CR |= BIT6; // set the start bit
    while(FLASH->SR & BIT0); // wait while busy
}
void readSector(uint32_t SectorStartAddress, void * values, uint16_t size)
{
    uint16_t *AddressPtr;
    uint16_t *valuePtr;
    AddressPtr = (uint16_t *)SectorStartAddress;
    valuePtr=(uint16_t *)values;
    size = size/2; // incoming value is expressed in bytes, not 16 bit words
    while(size)
    {
        *((uint16_t *)valuePtr)=*((uint16_t *)AddressPtr);
        valuePtr++;
        AddressPtr++;
        size--;
    }
}
Writes and reads must be performed in 16 bit (half word) chunks so a little bit of type casting is necessary. The data type for the values to be read or written is void *. This allows a pointer to any type be passed without generating warnings. The sector start address must be on a 1k boundary. In this chip, Flash memory starts at 0x8000000 so sector start addresses can be 0x8000000, 0x8000400, 0x8000800, 0x8000c00, etc.
The data sheet states that the flash can withstand at least 10000 write cycles (does this include erases?). This seems like a pretty large amount but you would be surprised how quickly it can get used up. If your program requires to write to Flash memory regularly consider some wear leveling scheme.
Full code is available over here on GitHub
More examples for the SAMD20
I’ve added some new examples for the SAMD20E16 MCU including Timer interrupts (using TC0) and PWM (also using TC0). The UART pins I previously used had to be moved to avoid a clash with the timer output pins. Examples are over here on github.
Serial transmission on the SAMD20
This is a follow up to a previous post about bare-metal programming of the SAMD20 MCU. It has been tricky. There is a very complex clock system in the SAMD20 which is difficult to set up. The UART itself is pretty straight forward however and I’ve added a simple UART transmit example to the github repository.
Shown below is a listing for the UART related and main functions. System clock setup is done in another file (init.c).
Next step: Interrupts.
/* User LED is on PA0 */
/* This example uses SERCOM0 (UART mode) to send data to a host PC
 *
 */
#include
#include "../samd20e16.h"
/*
 How to program: run openocd first
 Next, run arm-none-eabi-gdb in another window and execute these commands (adjust directory to suit)
 target remote :3333
 monitor at91samd chip-erase
 monitor reset halt
 monitor load_image /home/frank/Documents/programming/samd/Baremetal/samd20_examples/serial/main.elf 0
 monitor reset
*/
void delay(uint32_t dly)
{
    while(dly--);
}

void initUART()
{
    // UART is on:
    PM_APBCMASK |= BIT2; // turn on SERCOM0
    // Reset SERCOM 0
    SERCOM0_CTRLA = 1; // reset the UART
    while(SERCOM0_STATUS & BIT15); // wait for sync to complete
    while ( SERCOM0_CTRLA & BIT0 ); // wait for reset to complete
    // Will route the main 48MHz clock to SERCOM0 as the baud rate base clock.
    GCLK_CLKCTRL = 0x0d + BIT14;
    while(  (GCLK_STATUS & BIT7)); // wait for sync to complete
    SERCOM0_BAUD = 65325; // configure for 9600 bps
    while(SERCOM0_STATUS & BIT15); // wait for sync to complete
    SERCOM0_CTRLB = BIT17 + BIT16 + BIT9 ; // enable TX, RX, Start-of-frame wakeup, 1 stop bit, 8 bits;
    // 0x00030200 RXEN,TXEN,SFDE,
    while(SERCOM0_STATUS & BIT15); // wait for sync to complete
    SERCOM0_CTRLA = BIT30 + BIT20 + BIT2 + BIT1; // LSB first, UART mode , internal clock, PAD1 = RX, PAD0 = TX, ENABLE
    // 0x40000006 DORD,ENABLE,MODE001 (USART INTERNAL CLOCK), ENABLE
    while(SERCOM0_STATUS & BIT15); // wait for synchronization between clock domains to complete
    // The actual special function is selected by writing to the upper 4 bits of PAPMUX5
    // To select function C, write  '2' to these bits
    PAPMUX4 = 0x22;
    PAPPINCFG8 |= BIT0; // enable special function multplexing on Pin 11
    PAPPINCFG9 |= BIT0; // enable special function multplexing on Pin 12
}
void eputc(char c)
{
    SERCOM0_DATA = c;
    while((SERCOM0_INTFLAG & BIT1)==0);// wait for TXC flag

}
void printString(char *String)
{
    while (*String)
    {
        eputc(*String++);
    }
}
int main()
{
    int i=0;
    PADIRSET = BIT0; // make Port A bit 0 an output
    // Startup delay to allow escape from a potentially bricked chip: ONLY DELETE WHEN SURE OF PROPER CLOCK OPERATION
    for (i=0;i<10;i++)
    {
        PAOUTTGL = BIT0; // Toggle Port A bit 0
        delay(1000000);   // Wait
    }
    initUART(); // get SERCOM0 going
    while(1)
    {
        printString("Hello SamD!\r\n");
        i = SERCOM0_INTFLAG;
        PAOUTTGL = BIT0; // Toggle Port A bit 0
        delay(10000);   // Wait

    }

}
Bare-metal blinky on the SAMD20
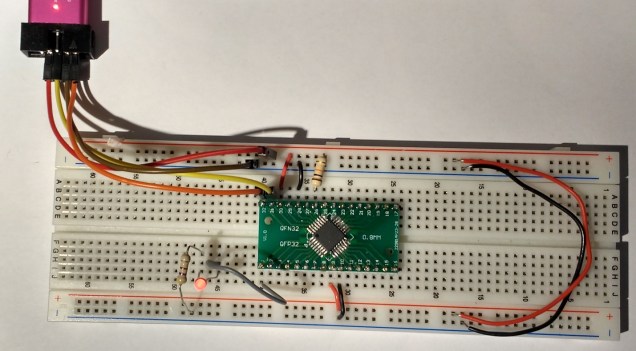
I’ve been curious about the SAMD20 processors for a while now. They were originally produced by Atmel who have since been bought by Microchip. The SamD20 MCU’s are Cortex M0+ parts with the usual sorts of onboard peripherals. I was interested in programming this part from the ground up with my own header files, linker scripts and so on. Initially I had no success with OpenOCD (version 0.10 supplied with Ubuntu) so I went and downloaded a slightly more recent source code snapshot (0.10.0+dev-00382-gbe87994d). This mostly works. I can reset the chip, halt it, examine registers and program it using a slightly out of the way syntax. Single step debugging and breakpoints work too. The main problem is with the load command in arm-none-eabi-gdb: it just won’t program it. There is a workaround however as shown below. Note: I’m using an ST-Link-V2 clone to program the chip. The openocd configuration file is in the git archive for this project (see below).
In one terminal window type:
openocd -f samd20.cfg
In another type:
arm-none-eabi-gdb
Once inside gdb
target remote :3333
monitor reset halt
monitor at91samd chip-erase
monitor reset halt
monitor load_image /home/frank/Documents/samd/Baremetal/Blinky/main.elf 0
monitor reset
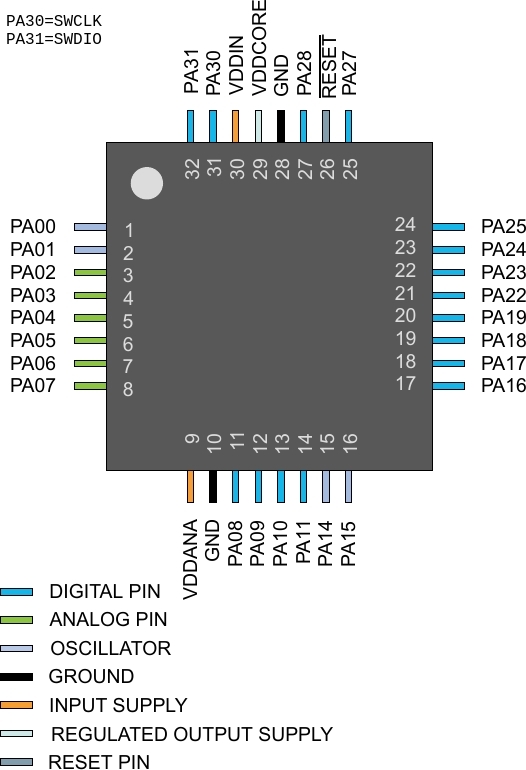
The debugger connects via SWCLK, SWDIO. VDDIN and VDDANA are connected to 3.3V and the various GND pins go back to 0V. The Reset pin is pulled up to 3.3V using a 10k resistor.
Higher resolution image
The blinky code is as follows:
/* User LED is on PA0 */
#include
#include "../samd20e16.h"
void delay(uint32_t dly)
{
    while(dly--);
}
int main()
{
    PADIRSET = BIT0; // make Port A bit 0 an output
    while(1)
    {
        PAOUTTGL = BIT0; // Toggle Port A bit 0
        delay(100000);   // Wait
    }
}
The header file samd20e16.h was written using peripheral addresses obtained in the datasheet.
The github repository is available here. I hope to grow this to include the other peripherals over the next week or two.
MSP432 Launchad and the TLV5618 DAC : code updates
Energia has moved on and some of the library definition have changed. Earlier examples I published that showed how to use a low cost DAC with the MSP432 Launchpad were failing to compile with this new version of Energia (1.6.10E18). I’ve update the examples and they can be downloaded from github here:
https://github.com/fduignan/msp432_examples/archive/master.zip
