Sprites, tiles, motion and transparency for DMB2022

All of the games I have written to date for embedded systems such as Breadboard Games and badges featured a uniform background which was usually black. This was simple to implement . If a character is to be moved, it is first overwritten with the background colour and then redrawn at a new location. More complex backgrounds that featured terrain such as grass or rock were not so easy to deal with. In a desktop programming environment I would probably tackle the problem as follows:

(1) Make a copy of the area that the character will obscure

(2) Draw the character

If a character is then to be moved, you simply write the copy of the obscured area to the screen to hide the character and then repeat the process at a new location.

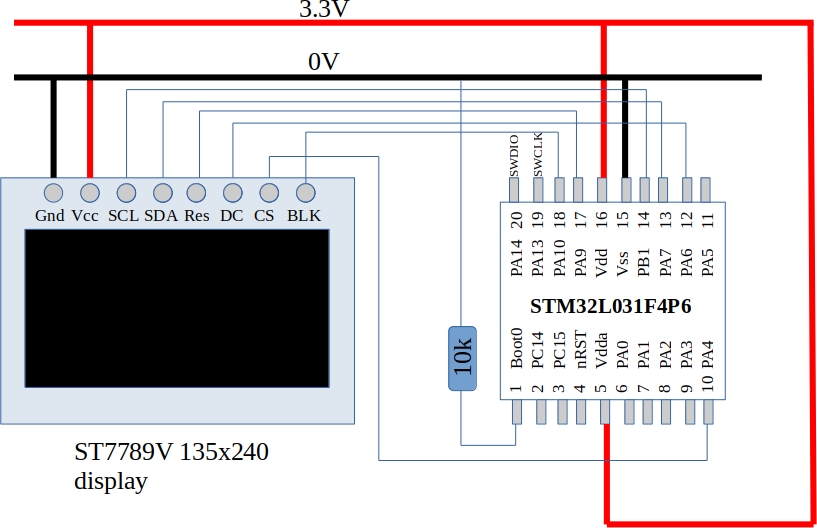
Step (1) requires a readable display buffer. The ST7789 in this project is a write-only device. In theory I could make a frame buffer big enough to hold the entire screen and then repeatedly write this out over the SPI interface. The display has 240×240 pixels, each pixel encoded in 16 bits. A complete framebuffer for this requires 240x240x2 = 115200 bytes. The NRF52833 MCU driving the display has 128kB of RAM so not much would be left over for stack and variables. Dividing the display up into “tiles” can greatly reduce the RAM requirements.

Let’s divide the screen up into 30×30 pixel tiles. This may seem a little large however the ST7789 screen is very small and has a high pixel density. A 30×30 tile represents an area of 3mm x 3mm approx within which a texture or character is drawn. Let’s also use the following two tiles:

The left tile represents a character in a game (surrounded by transparency), the right one represents grass on the ground. We can completely fill the screen with 64 grass tiles. When our character moves across this background it can cover (at least partially) at most 4 grass tiles. This means that we can make use of a framebuffer in RAM that is 2 tiles x 2 tiles or 60x60x2 bytes in size (7200 bytes). We can move the character across the framebuffer in RAM and then write the framebuffer to the display. If the character moves beyond the edge of the framebuffer we can move where we write the framebuffer to the display and adjust the character’s position within the framebuffer. The image below shows how the framebuffer moves when the character moves diagonally across the screen (the background was not drawn to emphasize the movement).

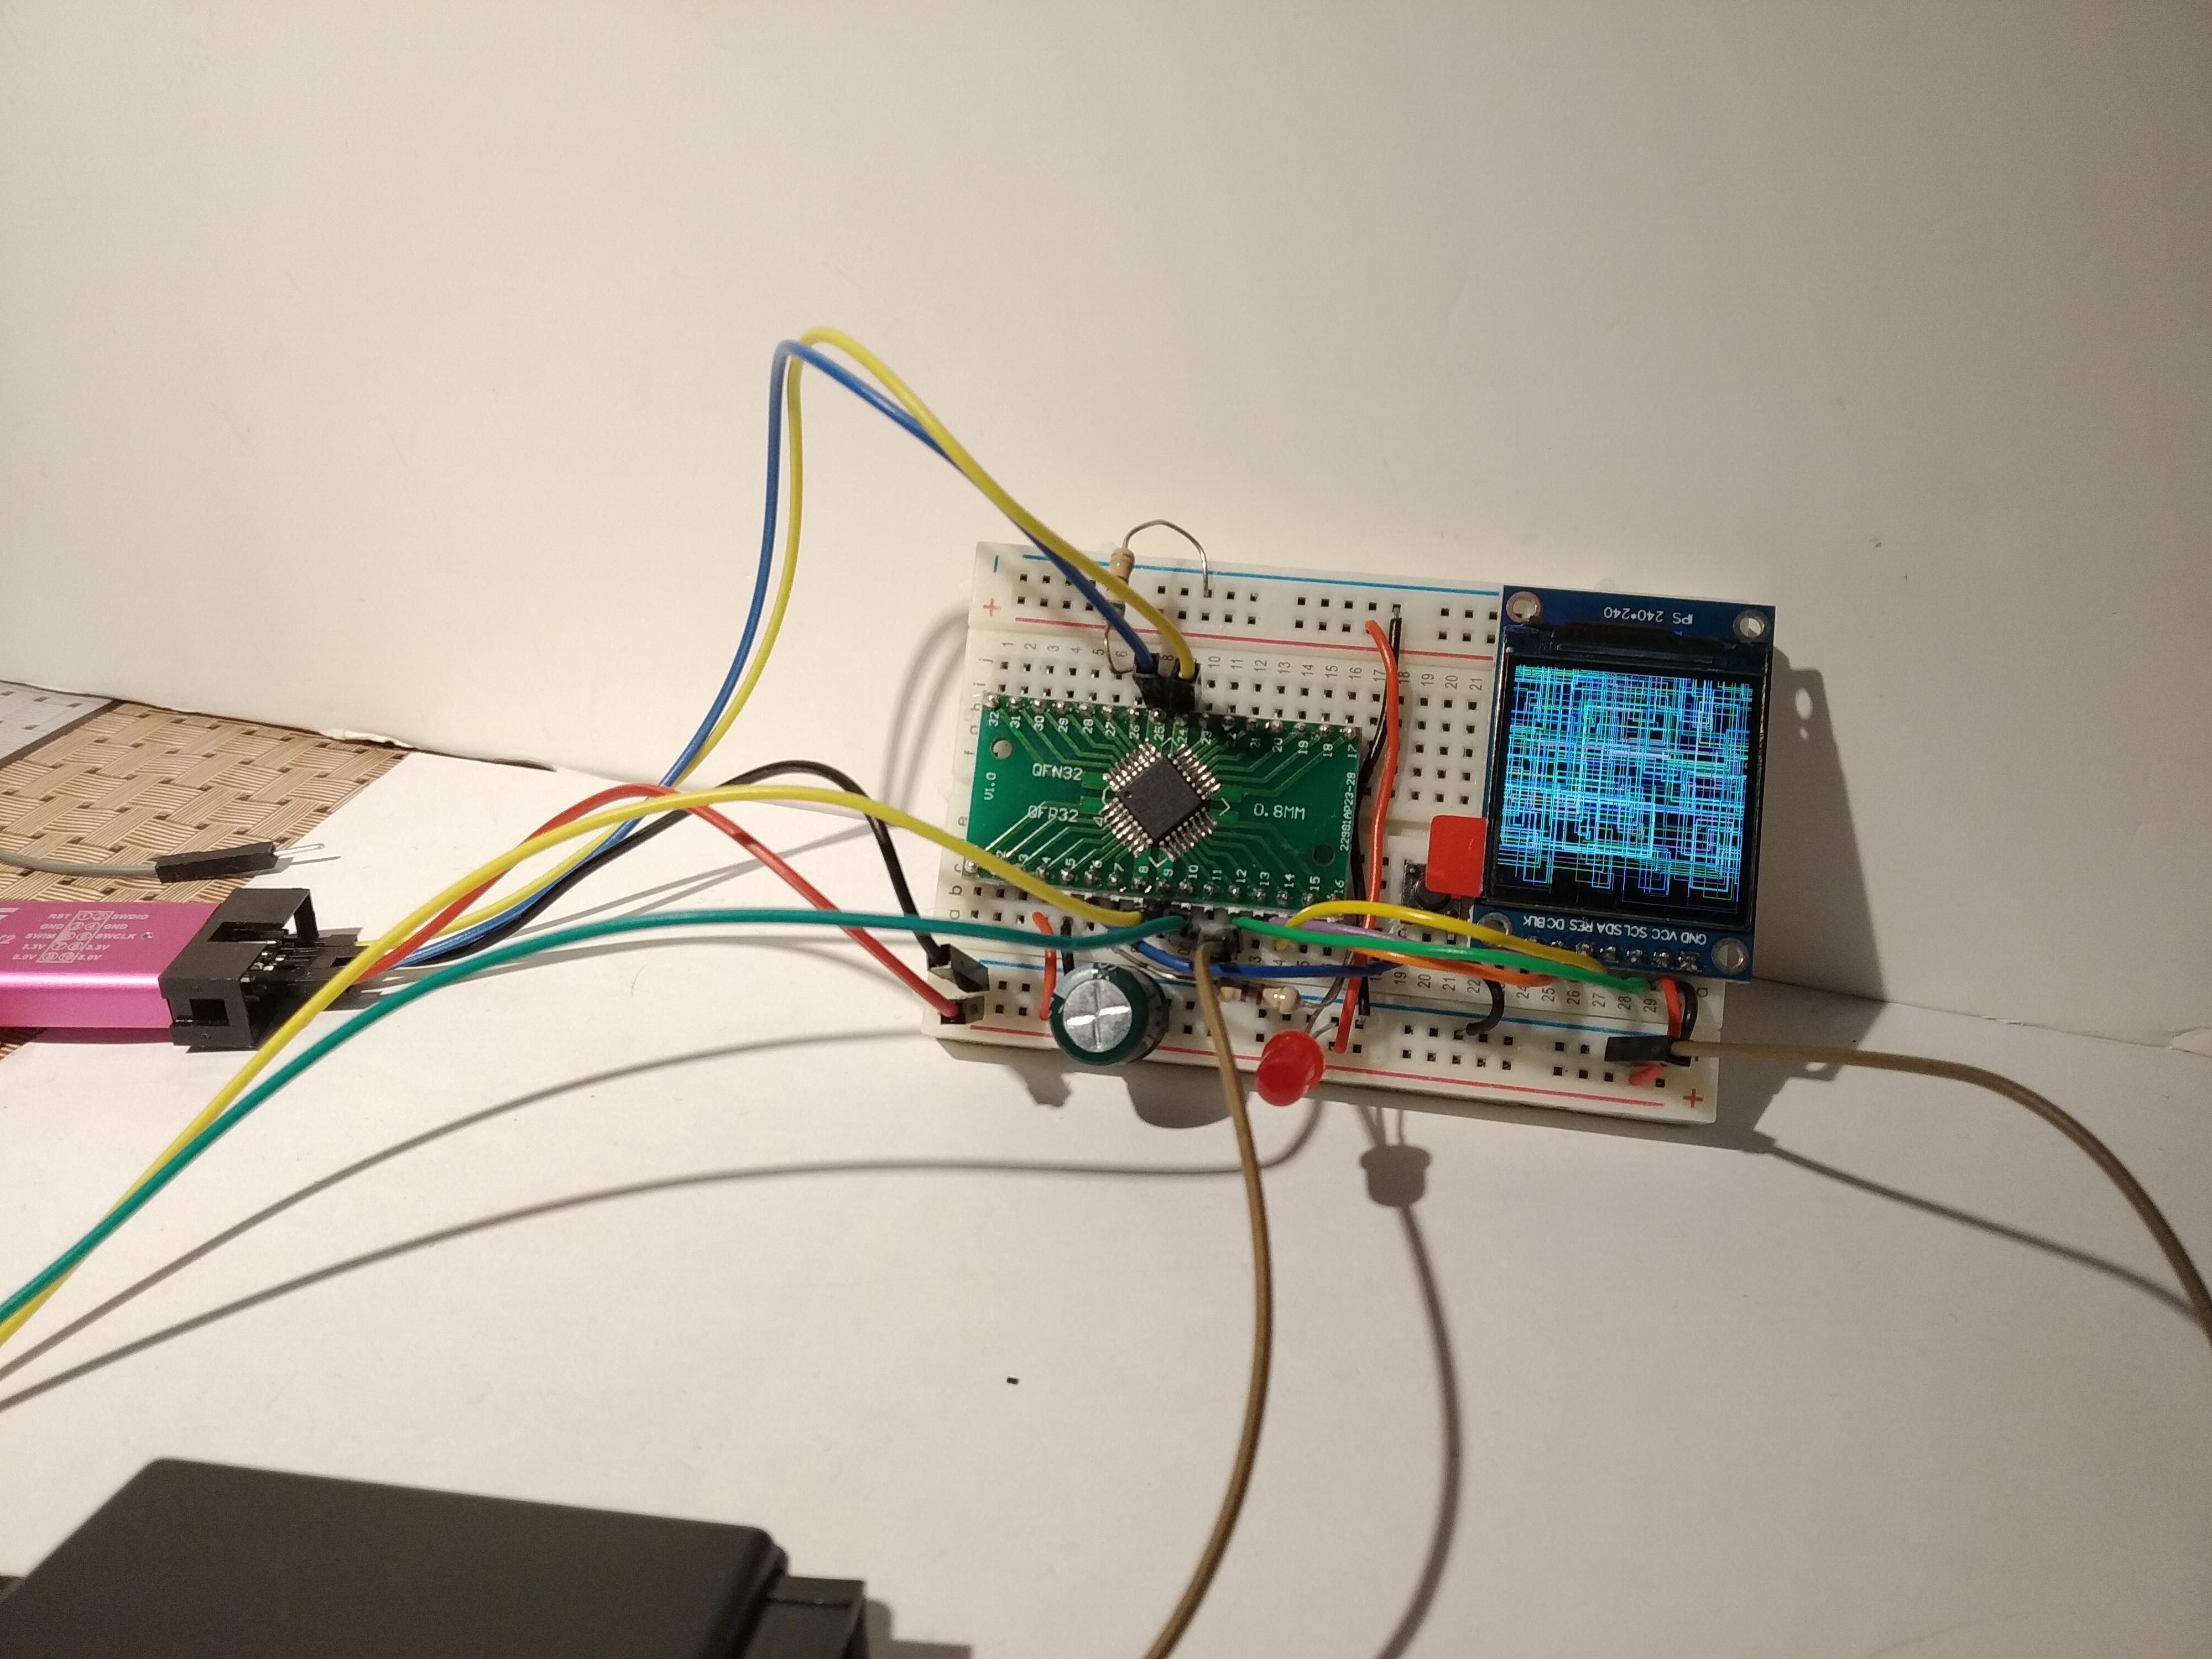
The character moves across screen as shown in the following video:

https://youtube.com/shorts/gbuUdUqhvyA?feature=share

As can be seen, the movement is smooth and quite fast (it is actually artificially slowed down). There is however a problem: The bounding square of the character is drawn as white which overwrites the background. It would be much better if the background bounding rectangle for the character was treated as transparent.

A slight detour for PNG files.

I’m using KolourPaint in KDE (Kubuntu) to produce the tiles. These images are saved as PNG files with 4 channels: Red, Green, Blue and Alpha. The Alpha channel represents the transparency of a pixel. In this case I’m concerned with two levels of this: completely opaque (Alpha=255) and completely transparent (Alpha = 0). These PNG files are converted to C header files which encode the RGB values into a 16 bit colour value suitable for use with the ST7789. As mentioned in a previous blog post, the ST7789 uses 565 (RGB) encoding. A value of 11111 111111 11111 represents white. A slightly different value of 11111 111110 11111 (the LSB of the green channel is set to 0) looks nearly the same on the screen. I decided that the colour value of 11111 111111 11111 (65535) would represent “transparent” while any value that was meant to be white would be re-encoded as 11111 111110 11111 (65503). The following python script was then used to convert the png file to a C header file.

# Want to deal with transparency.  Need to nominate a particular colour as "transparent"
# Going to go with 0xffff as being transparent
# if a pixel is designed to be this colour it will be changed to 
# 0b11111 111110 11111 
# i.e. the least significant green bit will be set to 0.  This is slightly off the intended white
# but not by much.
import sys
Filename=sys.argv[1]
Forename=Filename.split(".")[0]
from PIL import Image
img=Image.open(Filename)
width, height = img.size
pixels = list(img.getdata())
print("#define ",end="")
print(Forename,end="")
print("_width ",end="")
print(width)
print("#define ",end="")
print(Forename,end="")
print("_height ",end="")
print(height)
print("static const uint16_t ",end="")
print(Forename,end="")
print("[]={")
for x in range(0,width):
	
	for y in range (0, height):		
		(Red,Green,Blue,Alpha) = pixels[(x*height)+y]
		# Colour format : Red : 5 bits, Green 6 bits, Blue 5 bits
		# Assuming all components are in range 0 - 255
		if (Alpha == 255):
			Red = Red >> 3 # discard 3 bits
			Blue = Blue >> 3 # discard 3 bits
			Green = Green >> 2 # discard 2 bits
			st7789_16 = (Red << 11) + (Green << 5) + Blue
			low_byte = st7789_16 & 0xff
			# have to do an endian swap
			high_byte = st7789_16 >> 8
			st7789_16 = (low_byte << 8) + high_byte		
			if (st7789_16 == 0xffff):
				st7789_16 = 0b1111111111011111
			print(st7789_16, end="")			
		else:
			print("65535", end="")
		print(",")		
print("};")	

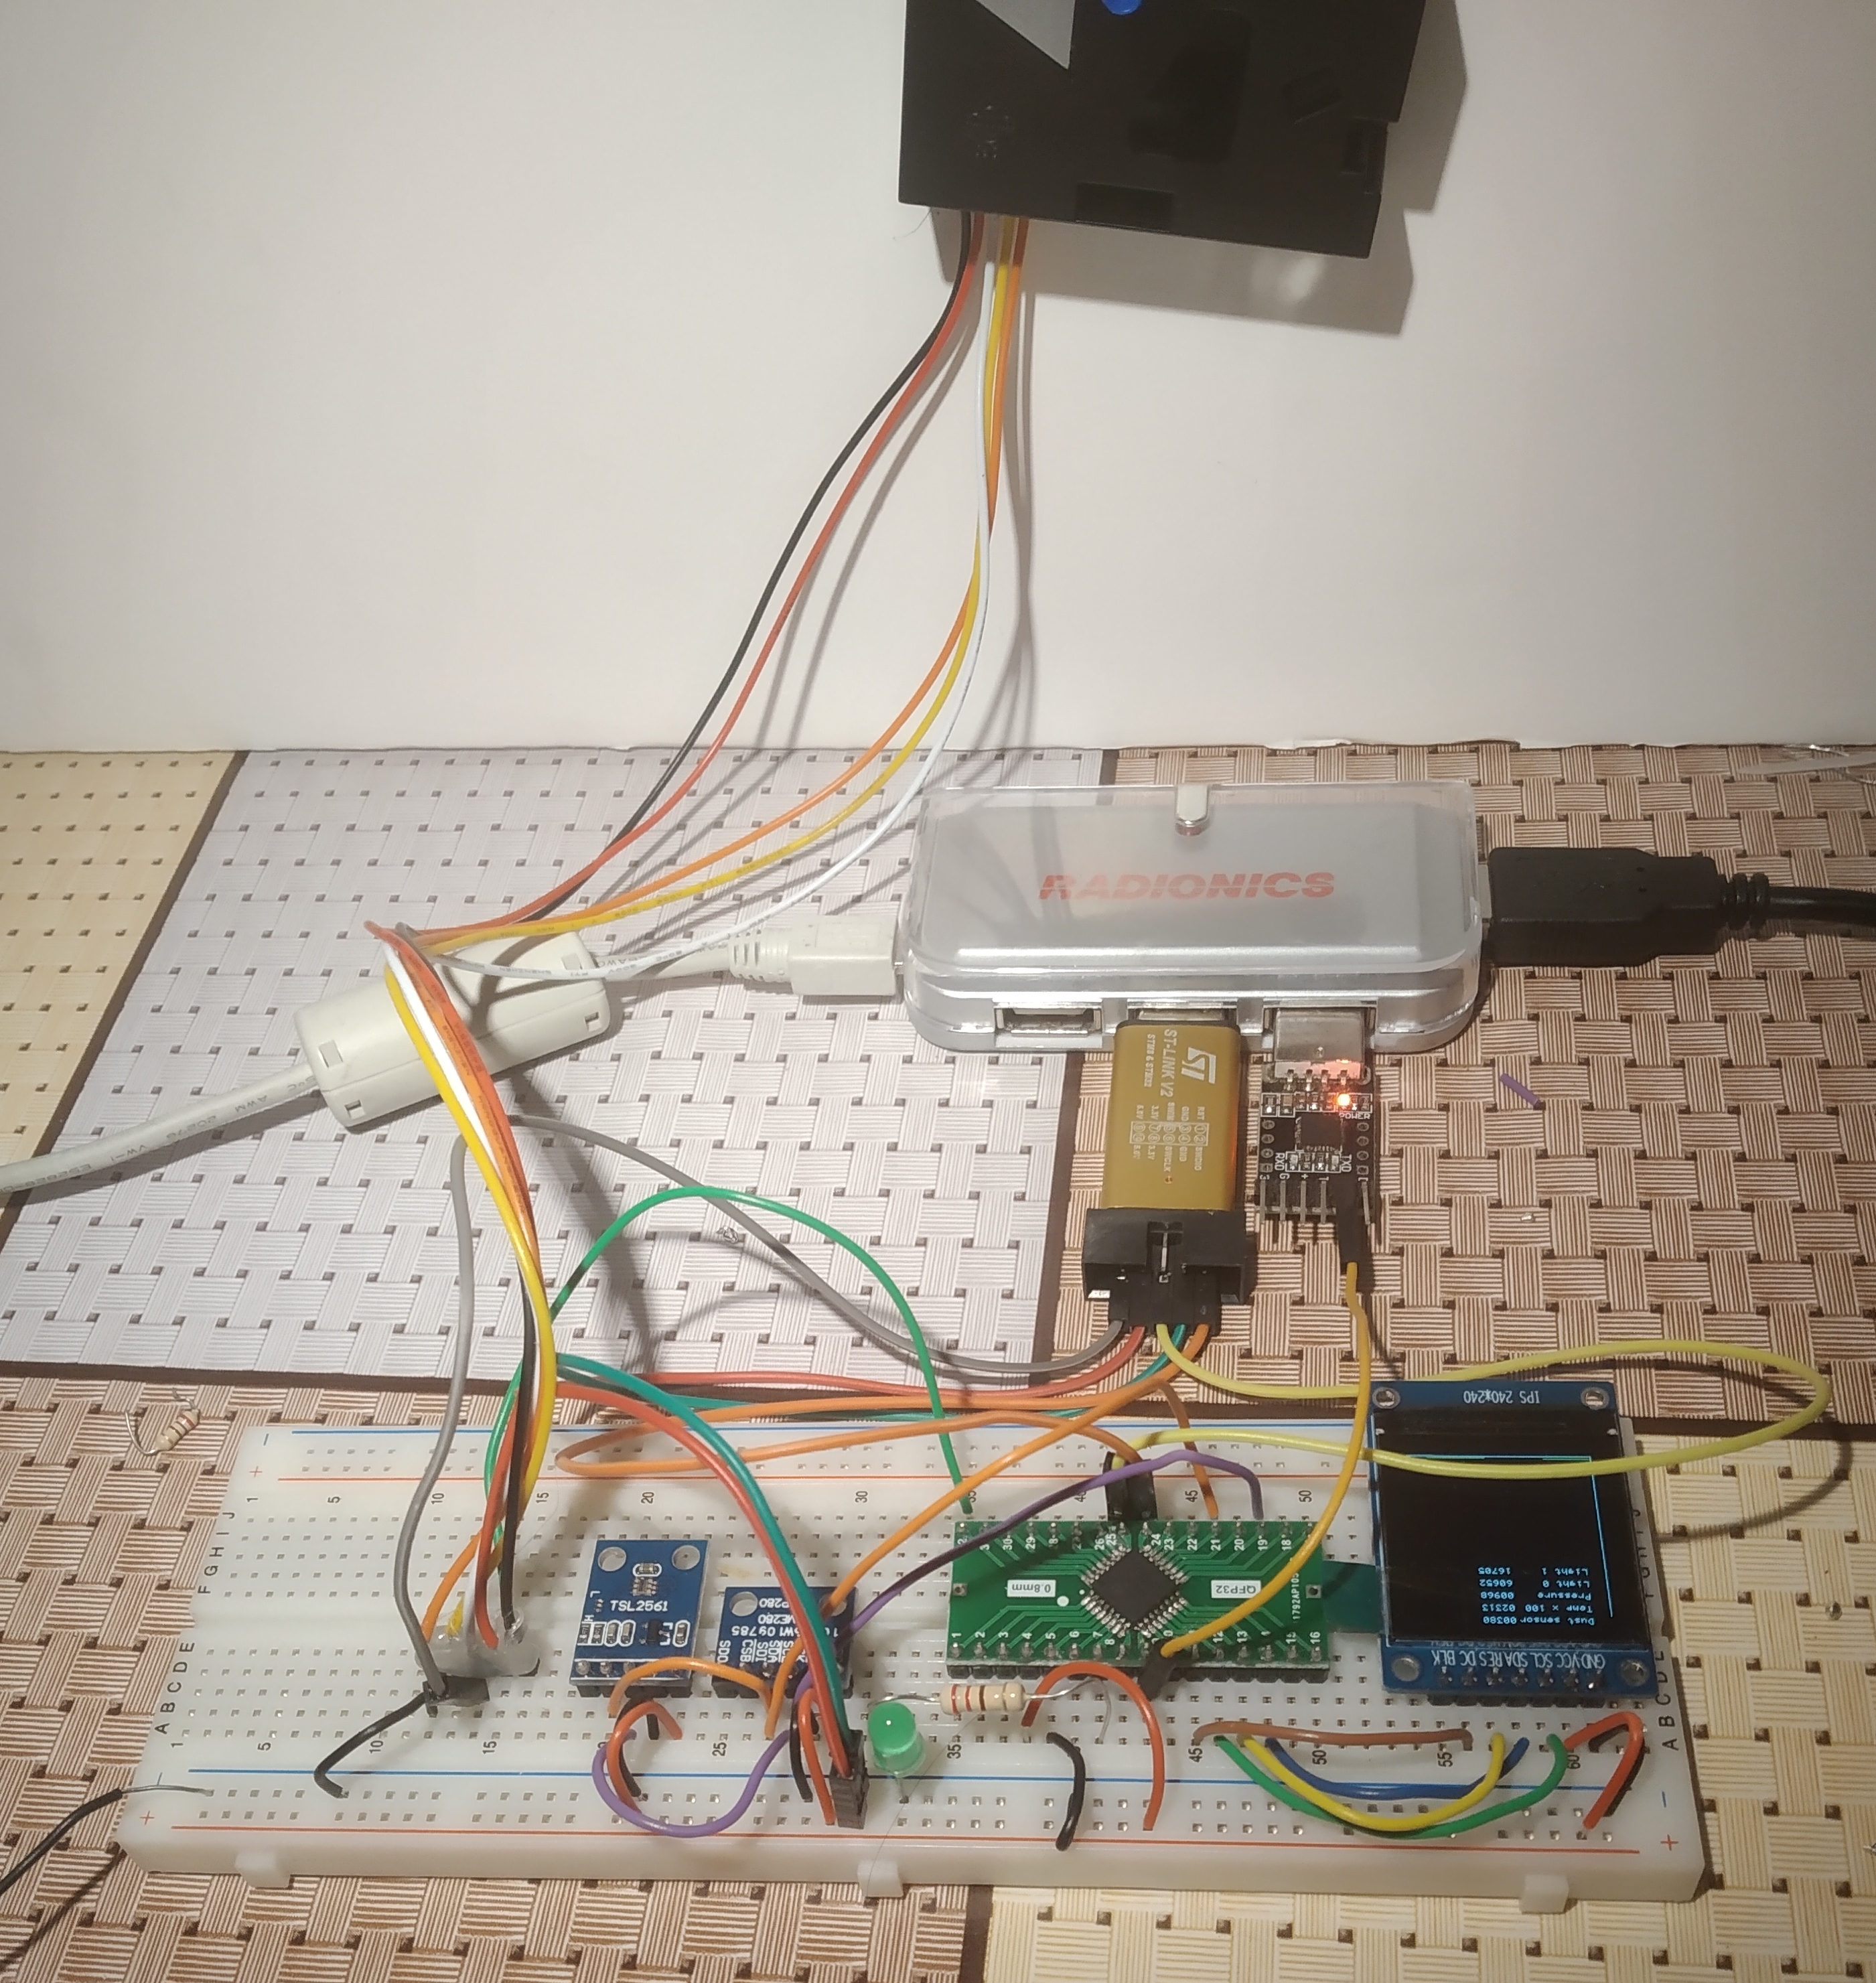
The framebuffer output functions were adapted to take this special transparent colour into account and the new motion now looks like this:

https://youtube.com/shorts/Vsr7n7rsNRI?feature=share

Once again, motion looks smooth (and has been artificially slowed down).

Code for all of this is in quite an untidy state for now but will be uploaded to github over the next couple of weeks

Adding an ST7789 display to my Microbit V2 and Zephyr setup

I wanted to learn about using an external SPI device with the BBC Microbit V2. I ported my ST7789 library over to a Zephyr based program shown running on the Microbit and it is shown in operation above. The SPI interface runs at a fairly slow 8MHz which I believe (for now) is the maximum for this interface. As a result, screen updates are not super quick but probably good enough for a simple user interface.

The display library supports the following functions:

int display_begin();
void display_command(uint8_t cmd);
void display_data(uint8_t data);
void display_openAperture(uint16_t x1, uint16_t y1, uint16_t x2, uint16_t y2);
void display_putPixel(uint16_t x, uint16_t y, uint16_t colour);
void display_putImage(uint16_t x, uint16_t y, uint16_t width, uint16_t height, uint16_t *Image);
void display_drawLine(uint16_t x0, uint16_t y0, uint16_t x1, uint16_t y1, uint16_t Colour);
int iabs(int x); // simple integer version of abs for use by graphics functions
void display_drawRectangle(uint16_t x, uint16_t y, uint16_t w, uint16_t h, uint16_t Colour);
void display_fillRectangle(uint16_t x,uint16_t y,uint16_t width, uint16_t height, uint16_t colour);
void display_drawCircle(uint16_t x0, uint16_t y0, uint16_t radius, uint16_t Colour);
void display_fillCircle(uint16_t x0, uint16_t y0, uint16_t radius, uint16_t Colour);
void display_print(const char *Text, uint16_t len, uint16_t x, uint16_t y, uint16_t ForeColour, uint16_t BackColour);
uint16_t display_RGBToWord(uint16_t R, uint16_t G, uint16_t B);

Code is available over here on github.

Microbit V1 display driver

The image above shows a Microbit V1 connected to an ST7789 1.14′ display via a Kitronik breakout board. The SPI interface on the Microbit (NRF51822) is a little slow at 4MHz but it is ok for simple outputs as shown above. Code was developed using VSCode, PlatformIO the mbed framework. The full list of connections can be found in the file display.cpp which is available on the github repo over here

Dublin Maker 2020+ badge.

Dublin Maker didn’t happen this year because of Covid-19. I had been working on a badge (unofficial) but then parked the project for a while. Recently I resurrected it and have begun building badges. Software is not complete yet and the documentation needs to be developed but the picture above shows an almost complete badge without the display fitted (it overlays the MCU in the middle of the badge). Just about all of the background hardware driver code is done.

The 2019 badge took a hardwired wired approach to multi-player gaming. While this worked, it was a little unreliable mainly due to low quality 3.5mm stereo sockets and cables. This badge uses an NRF24L01 radio module instead and it appears to work quite well. Also it is actually a little cheaper than the wired version. Other differences include a change to the MCU which features more pins and double the flash memory (32kB!!). The most notable change however is probably the use of a PCB. This was designed in KiCad and fabricated by PCBWay – a process that was surprisingly cheap, quick and easy.

Lets hope Dublin Maker 2021 takes place.

The STM32G030

The STM32G030 is similar in many ways to the STM32F030. It has approximately the same peripherals and is available for a similar price (in western countries). There are some significant differences however:
The ‘G030 however uses a Cortex M0+ (instead of the M0 in the F030),
The ‘G030 has a maximum clock speed of 64MHz (48MHz for the F030),
The model I chose STM32G030K8T6 has twice the Flash (64KB) and twice the RAM (8KB) that the ‘F030 has.
stm32g030_display
Full size image
I’ve put together a number of examples over on github that might help someone get started. These include a simple blinky, serial comms, serial comms with an ADC, systick interrupts and finally driving an ST7789 LCD display.

Performance improvement for STM32F030/ST7789 graphics library

stm32f030_st7789_nrf24l01

I’ve been working on a new project involving an STM32F030, an ST7789 display and an NRF24L01 radio link. As part of this project I took a good look at the graphics library that I used in the Dublin Maker badge in 2019. It turns out that there was plenty of scope to improve it’s performance. Tweaks included flattening function calls and using the set/reset registers in the STM32F030. Here’s an excerpt from the old library:

void display::fillRectangle(uint16_t x, uint16_t y, uint16_t width, uint16_t height, uint16_t Colour)
{
    openAperture(x, y, x + width - 1, y + height - 1);
    for (y = 0; y < height; y++)
    {
        for (x = 0; x < width; x++)
        {
            writeData16(Colour);
        }
    }
}
void display::RSLow()
{
    GPIOB->ODR &= ~(1 << 1); // drive D/C pin low
}
void display::RSHigh()
{ 
    GPIOB->ODR |= (1 << 1); // drive D/C pin high
}

The new version of these functions looks like this:

void display::fillRectangle(uint16_t x, uint16_t y, uint16_t width, uint16_t height, uint16_t Colour)
{
    
    register uint32_t pixelcount = height * width;
    uint16_t LowerY = height+y;
    if ((LowerY) <= VIRTUAL_SCREEN_HEIGHT) 
    {
        openAperture(x, y, x + width - 1, y + height - 1);
        RSHigh();
        while(pixelcount--)
            transferSPI16(Colour);
    }
    else
    {
        // Drawing a box beyond the extents of the virtual screen.  
        // Need to wrap this around to the start of the screen.
        uint16_t LowerHeight = (VIRTUAL_SCREEN_HEIGHT-y);
        uint16_t UpperHeight = height - LowerHeight;
        openAperture(x, y, x + width - 1, VIRTUAL_SCREEN_HEIGHT-1);
        RSHigh();
        pixelcount = LowerHeight * width;
        while(pixelcount--)
            transferSPI16(Colour);
      
        openAperture(x, 0,x + width - 1, UpperHeight);
        RSHigh();
        pixelcount = UpperHeight * width;
        while(pixelcount--)
                transferSPI16(Colour);
        
    }
}
void display::RSLow()
{ 
// Using Set/Reset register here as this needs to be as fast as possible   
    GPIOB->BSRR = ((1 << 1) << 16); // drive D/C pin low
}
void display::RSHigh()
{ 
// Using Set/Reset register here as this needs to be as fast as possible     
    GPIOB->BSRR = ((1 << 1)); // drive D/C pin high
}

The new version is a good deal bigger for a couple of reasons:
First of all, the fill rectangle function has been extended so that it is usable with display scrolling (a new feature)
Secondly, the call to writeData16 has been eliminated (removing the function call overhead). This means that lower level SPI function calls have to be used. Also, the nested loop for x and y co-ordinates has been changed to a single loop that fires out the pixels as a continuous stream – the display hardware itself looks after the x and y coordinates.

So how much faster is it? To test this I wrote a simple program to fire a full filled rectangle at the display 50 times and measured how long it took.
The results:
The old driver :
50 rectangles (240*240) took 8.6 seconds. This corresponds to a pixel write speed of 334883 pixels per second.
The new driver:
50 rectangles (240*240) took 4.6 seconds or 626086 pixels per second. Nearly twice as fast as the older library. At this speed it takes 92 milliseconds to fill the display. Not stellar by PC standards but good enough for my needs.
Code is available over on github.

Environmental sensing using the STM32G071

stm32g071_environment_assembled_board
Full size image
This project displays information about the environment on an ST7789 display. There’s a text version of the data and a simple trend graph of the dust/pollen data. The sensors used are as follows:
Pressure/Temperature: BMP280
Light : TLS2561
Dust : DM501A

The BMP280 and TLS2561 connect back to the STM32G071 over the I2C1 bus. The DM501A light sensor connects back to a GPIO pin. This pin is sampled at 1kHz. When a dust particle is detected in the sensor this pin is driven low. The program simply counts the number of milliseconds (samples) that this pin is low over a 1 minute interval and displays this figure.

Environmental information is sent back to a host PC using a UART. It is also written to the ST7789 display.

Code is available over here on github.

The STM32F030 driving an ST7789 display

The ST7789 display used in this example is a 1.3 inch 240×240 colour LCD display. It interfaces to the STM32F030 at the pretty fast speed of 24MHz. The display is connected as follows:
stm32f030_st7789_schematic
My intention with this circuit is to create a low cost conference badge (actually for Dublin Maker 2019). The target bill-of-materials cost is €5 – most of which is attributed to the display.
stm32f030_st7789
Full size image
Connecting the hardware is only part of the story however and a software library is also required. This was based on the Breadboard Games code from last August in Wexford. The main changes that had to be addressed were the new initialization code and the openAperture code. These were based on the Adafruit library code and the manufacturer’s datasheet. This library includes some graphic drawing primitives as well as other functions to support game play (e.g. timing and random number generation). Additional functions will be added as the badge develops.
Code is available on github
A video of the library in operation is available on YouTube.