This event’s focus is not so much on delivering a finished game as delivering a platform for learning micropython.

The board consists of a SeedStudio/Xiao RPI2040 which has just enough pins for this project. It also has a built-in WS2812 RGB Led along with additional LED’s on board.
A set of construction images is shown below. Be careful to place the wires and components exactly as shown. The breadboard has rows labelled a to j and columents 1 to 63 which may help when inserting components. If you would like to know more about breadboards this video may help:
Construction image gallery
The following three images show the placement of the display wires and grounds on this board
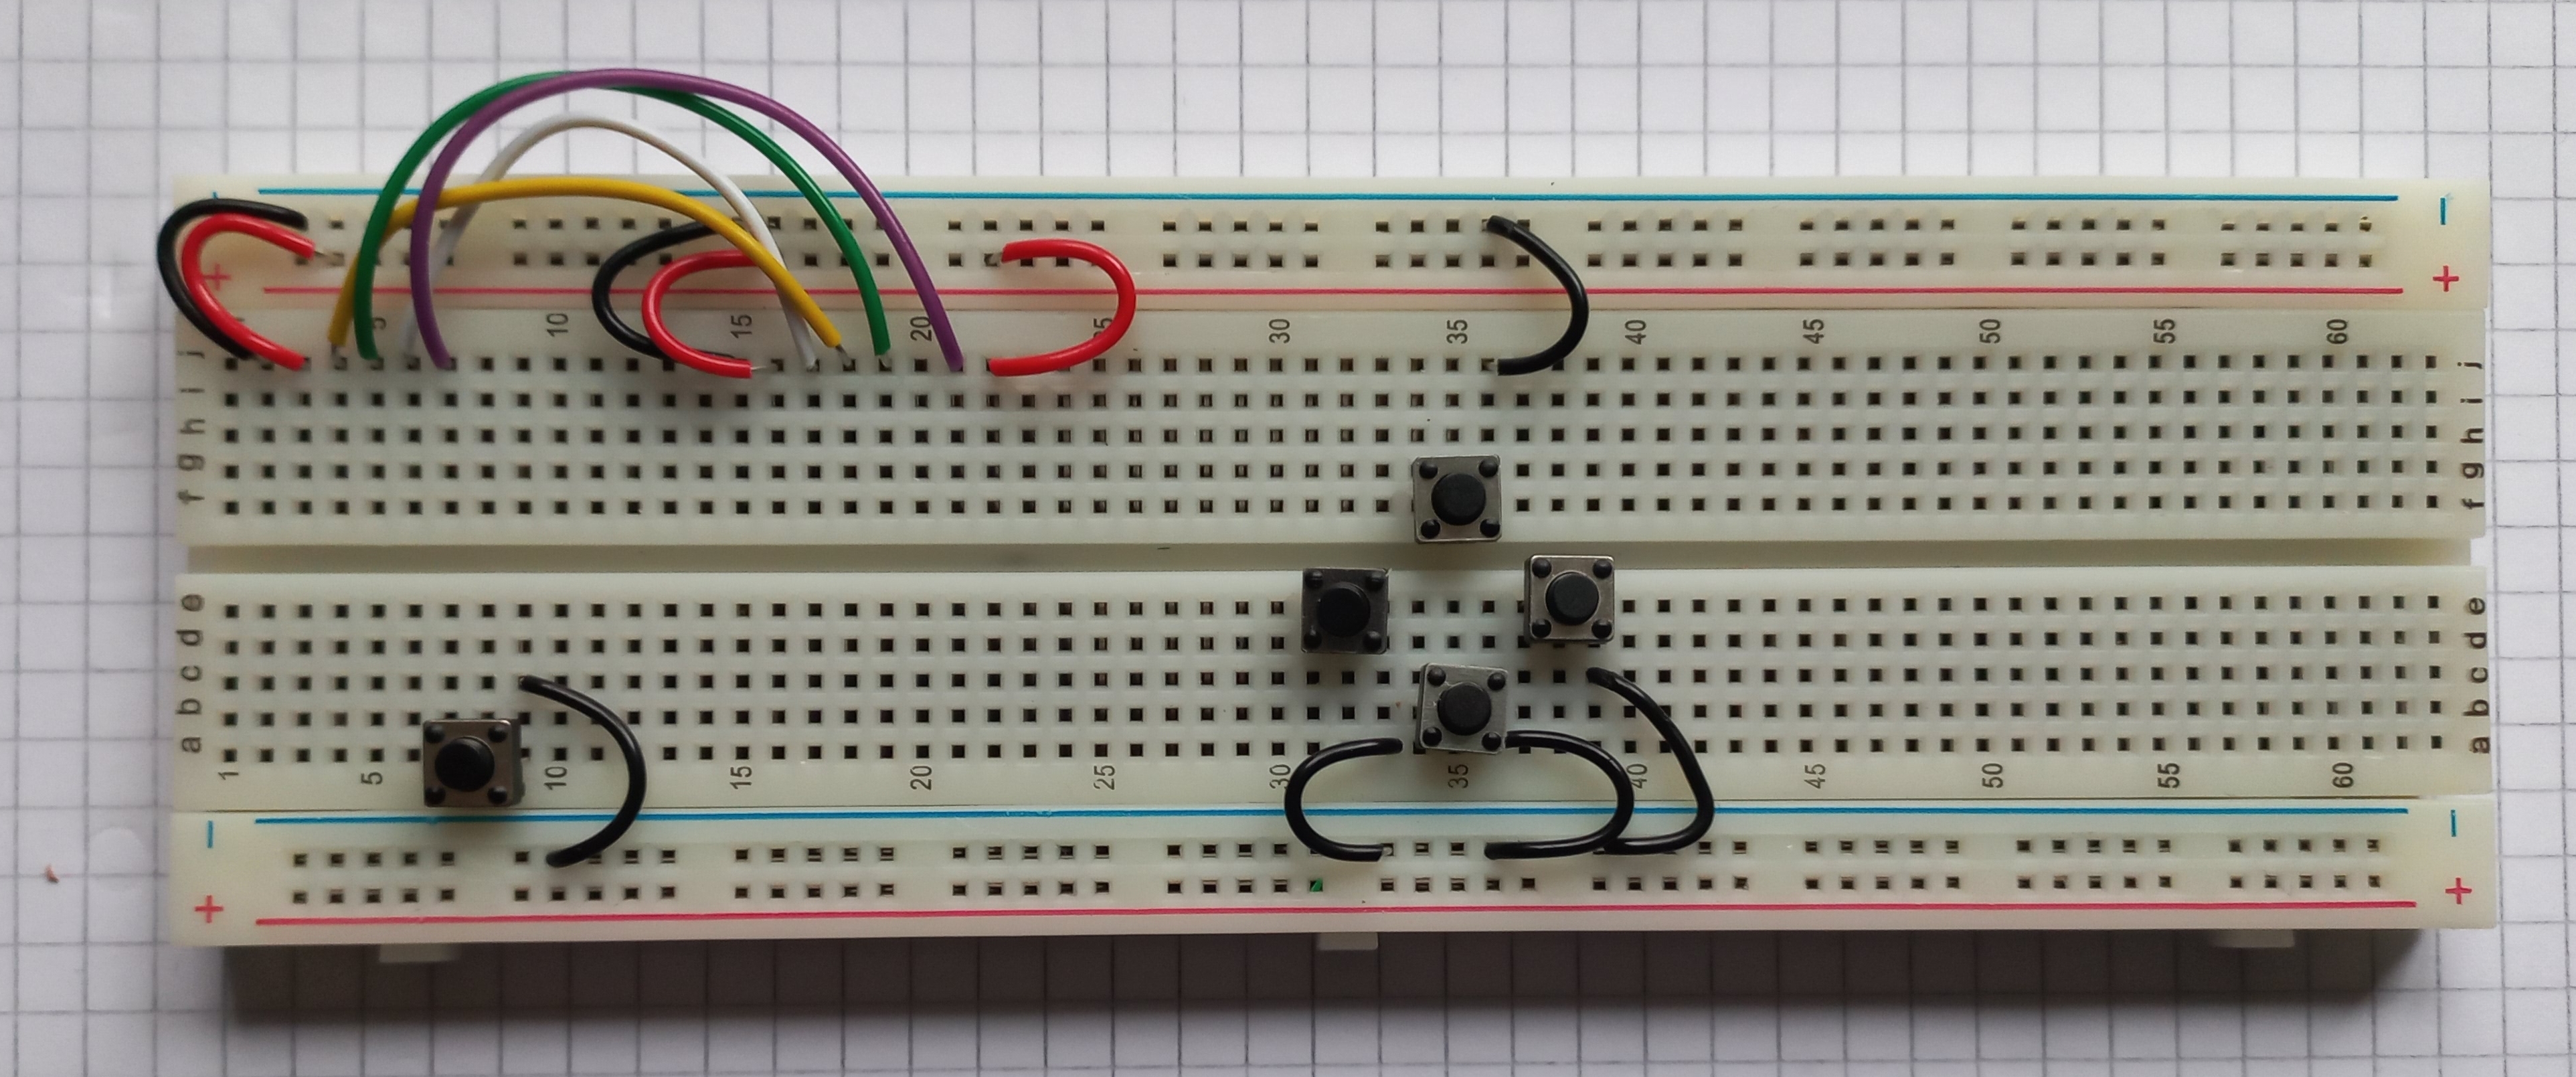


The image below shows the placement of the gamepad wiring. Be sure to run the wires in the slot as shown. The left-most button is equivalent to the A button on a game controller. Its left pin lines up with a pin on the microcontroller development board so no wire is needed for it (apart from ground).

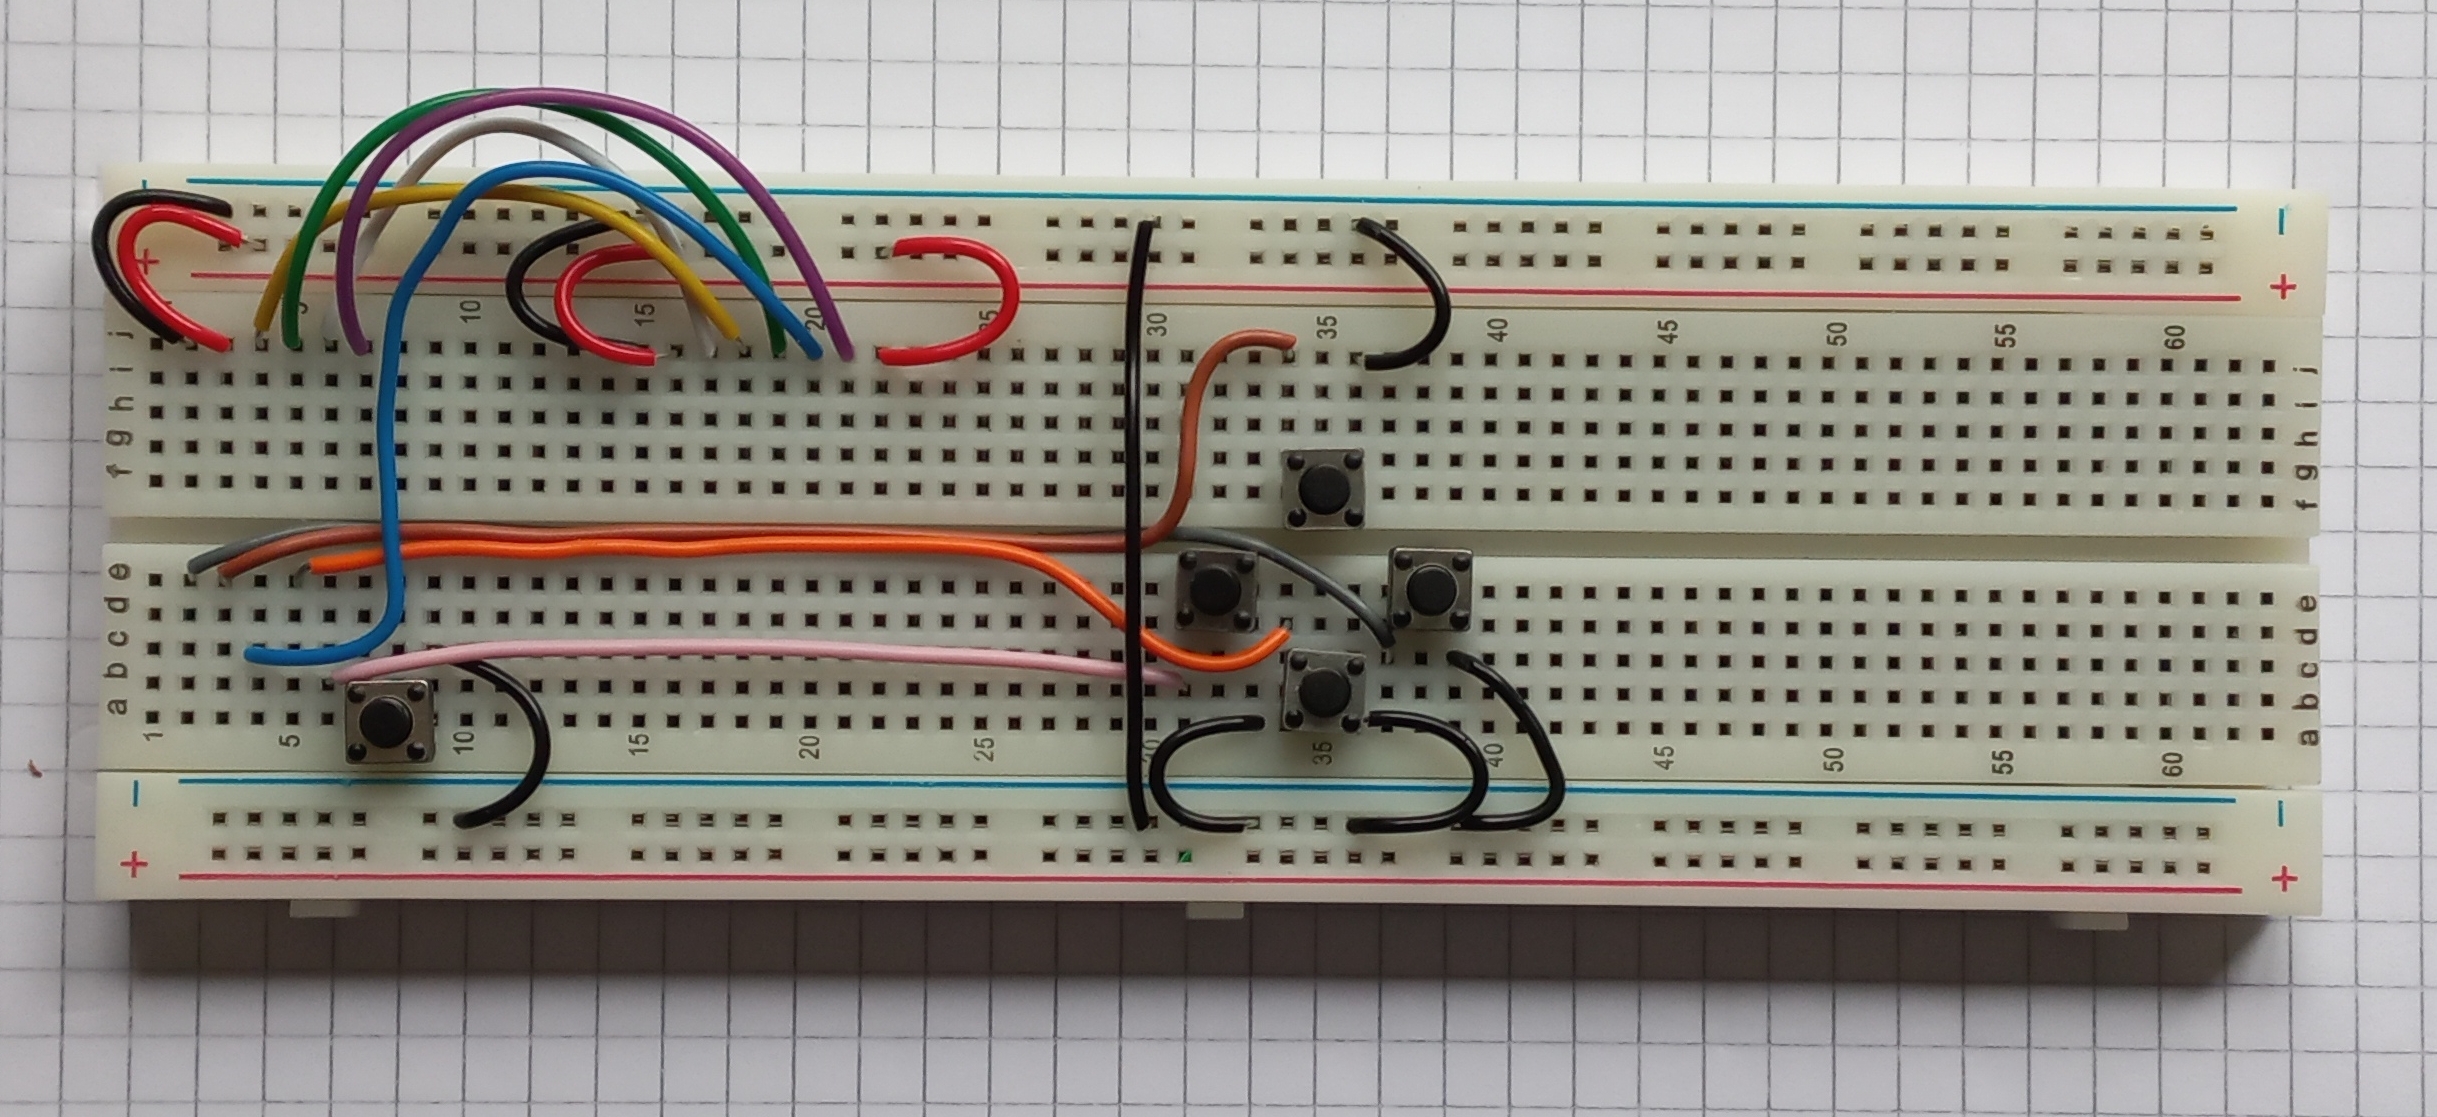
The long black and blue wires are shown below. Be careful to leave space for the microcontroller board when routing the blue wire.
The microcontroller boards is placed as shown. It fits in to the left-most holes of the breadboard.

The buzzer placement is shown below. One pin goes into the ground track of the breadboard, the other wire goes to the leftmost column of the breadboard just below the microcontroller board.

Finally, fit the display as shown below. Be careful to line up the pins with the wires as shown.

Programming
Our game console is programmed in Micropython which is best accessed using the Thonny development environment. There are three ready-made games which will hopefully help your learning of micropython and the hardware on our board. There is also a place for you to create your own game. When the board starts you are presented with a menu which allows you select from these (press A to select). There are lots of micropython and python learning resources on the Internet. The basics of Python can be studied here: https://www.w3schools.com/python/. Micropython tutorials tend to be board specific. A tutorial for our XIAO board can be found here: https://wiki.seeedstudio.com/XIAO-RP2040-with-MicroPython/. Board documentation is available here (check the rpi2040 chapter): https://files.seeedstudio.com/wiki/XIAO/Seeed-Studio-XIAO-Series-SOM-Datasheet.pdf
The code you will use in this exercise includes additionaly libraries to manage our specific hardware. This hardware includes the display, the buzzer, the various buttons and the onboard RGB led. Here is a list of the functions within these libraries.
Functions that control the display
putPixel(x,y,colour): lights up a display pixel with the specified location and colour
drawLine(x0,y0,x1,y1,colour): x0,y0 = start point, x1,y1 = end point
fillRectangle(x1,y1,w,h,colour): x1,y1 = top left corner, w=width, h=height
drawRectangle(x1,y1,w,h,Colour): x1,y1 = top left corner, w=width, h=height
clear(): clear the screen to black
putImage(x,y,w,h,img,horiz,vert): put image at x,y. Width is w, height is h. Image data is in img and h,v specify whether image is inverted in horizontal or vertical axes
setOrientation(h,v): set display orientation (0,0) = default
print(text, x, y, forecolour, backcolour): print text at x,y with foreground and background colours
drawCircle(x0,y0,radius,colour): circle with
fillCircle(x0,y0,radius,colour):
RGBToWord(r,g,b): convert 8 bit red, green and blue values to a 16 bit colour value
Functions that use the gamepad buttons
leftPressed(): returns 1 if the left button was pressed
rightPressed(): returns 1 if the right button was pressed
downPressed(): returns 1 if the down button was pressed
upPressed(): returns 1 if the up button was pressed
aPressed(): returns 1 if the A button was pressed
buttonPressed(): returns a bit patten for the various buttons (0 if nothing pressed)
Functions that manage sound
sound.tune.append() : append a note to the sound array
sound.note(frequency,duration,pause)
Sprite functions
sprite(x,y,w,h,image,display): creates at sprite with the initial position x,y. Bounding rectangle height=h,width=w
show(): show the sprite on screen
hide(): hide the sprite
move(newx, newy): move the sprite (erase at the previous location)
move_no_erase(newx, newy): move the sprite (don’t at the previous location)
setOrientation(horiz, vert): set sprite horizontal and vertical orientation (default 0,0)
isOverlapping(sprite2): do this sprite overlap another?
RGB Led support
set_colour(self,red,green,blue): light up the onboard LED with the particular color
Once you have finished building the board (and playing the games) we will explore how you might write your own game. Starter code for this event is available below:
