Welcome to Beadboard Games 2024. In this workshop you will assemble a breadboard circuit based around the Raspberry Pi Pico (RPi Pico) and an LCD display. Following this, you will explore the programs that are already installed on the RPi Pico and you learn to write some Micropython code to generate patterns on the LCD, monitor the buttons and make sounds.
Assembly instructions for Breadboard games 2024
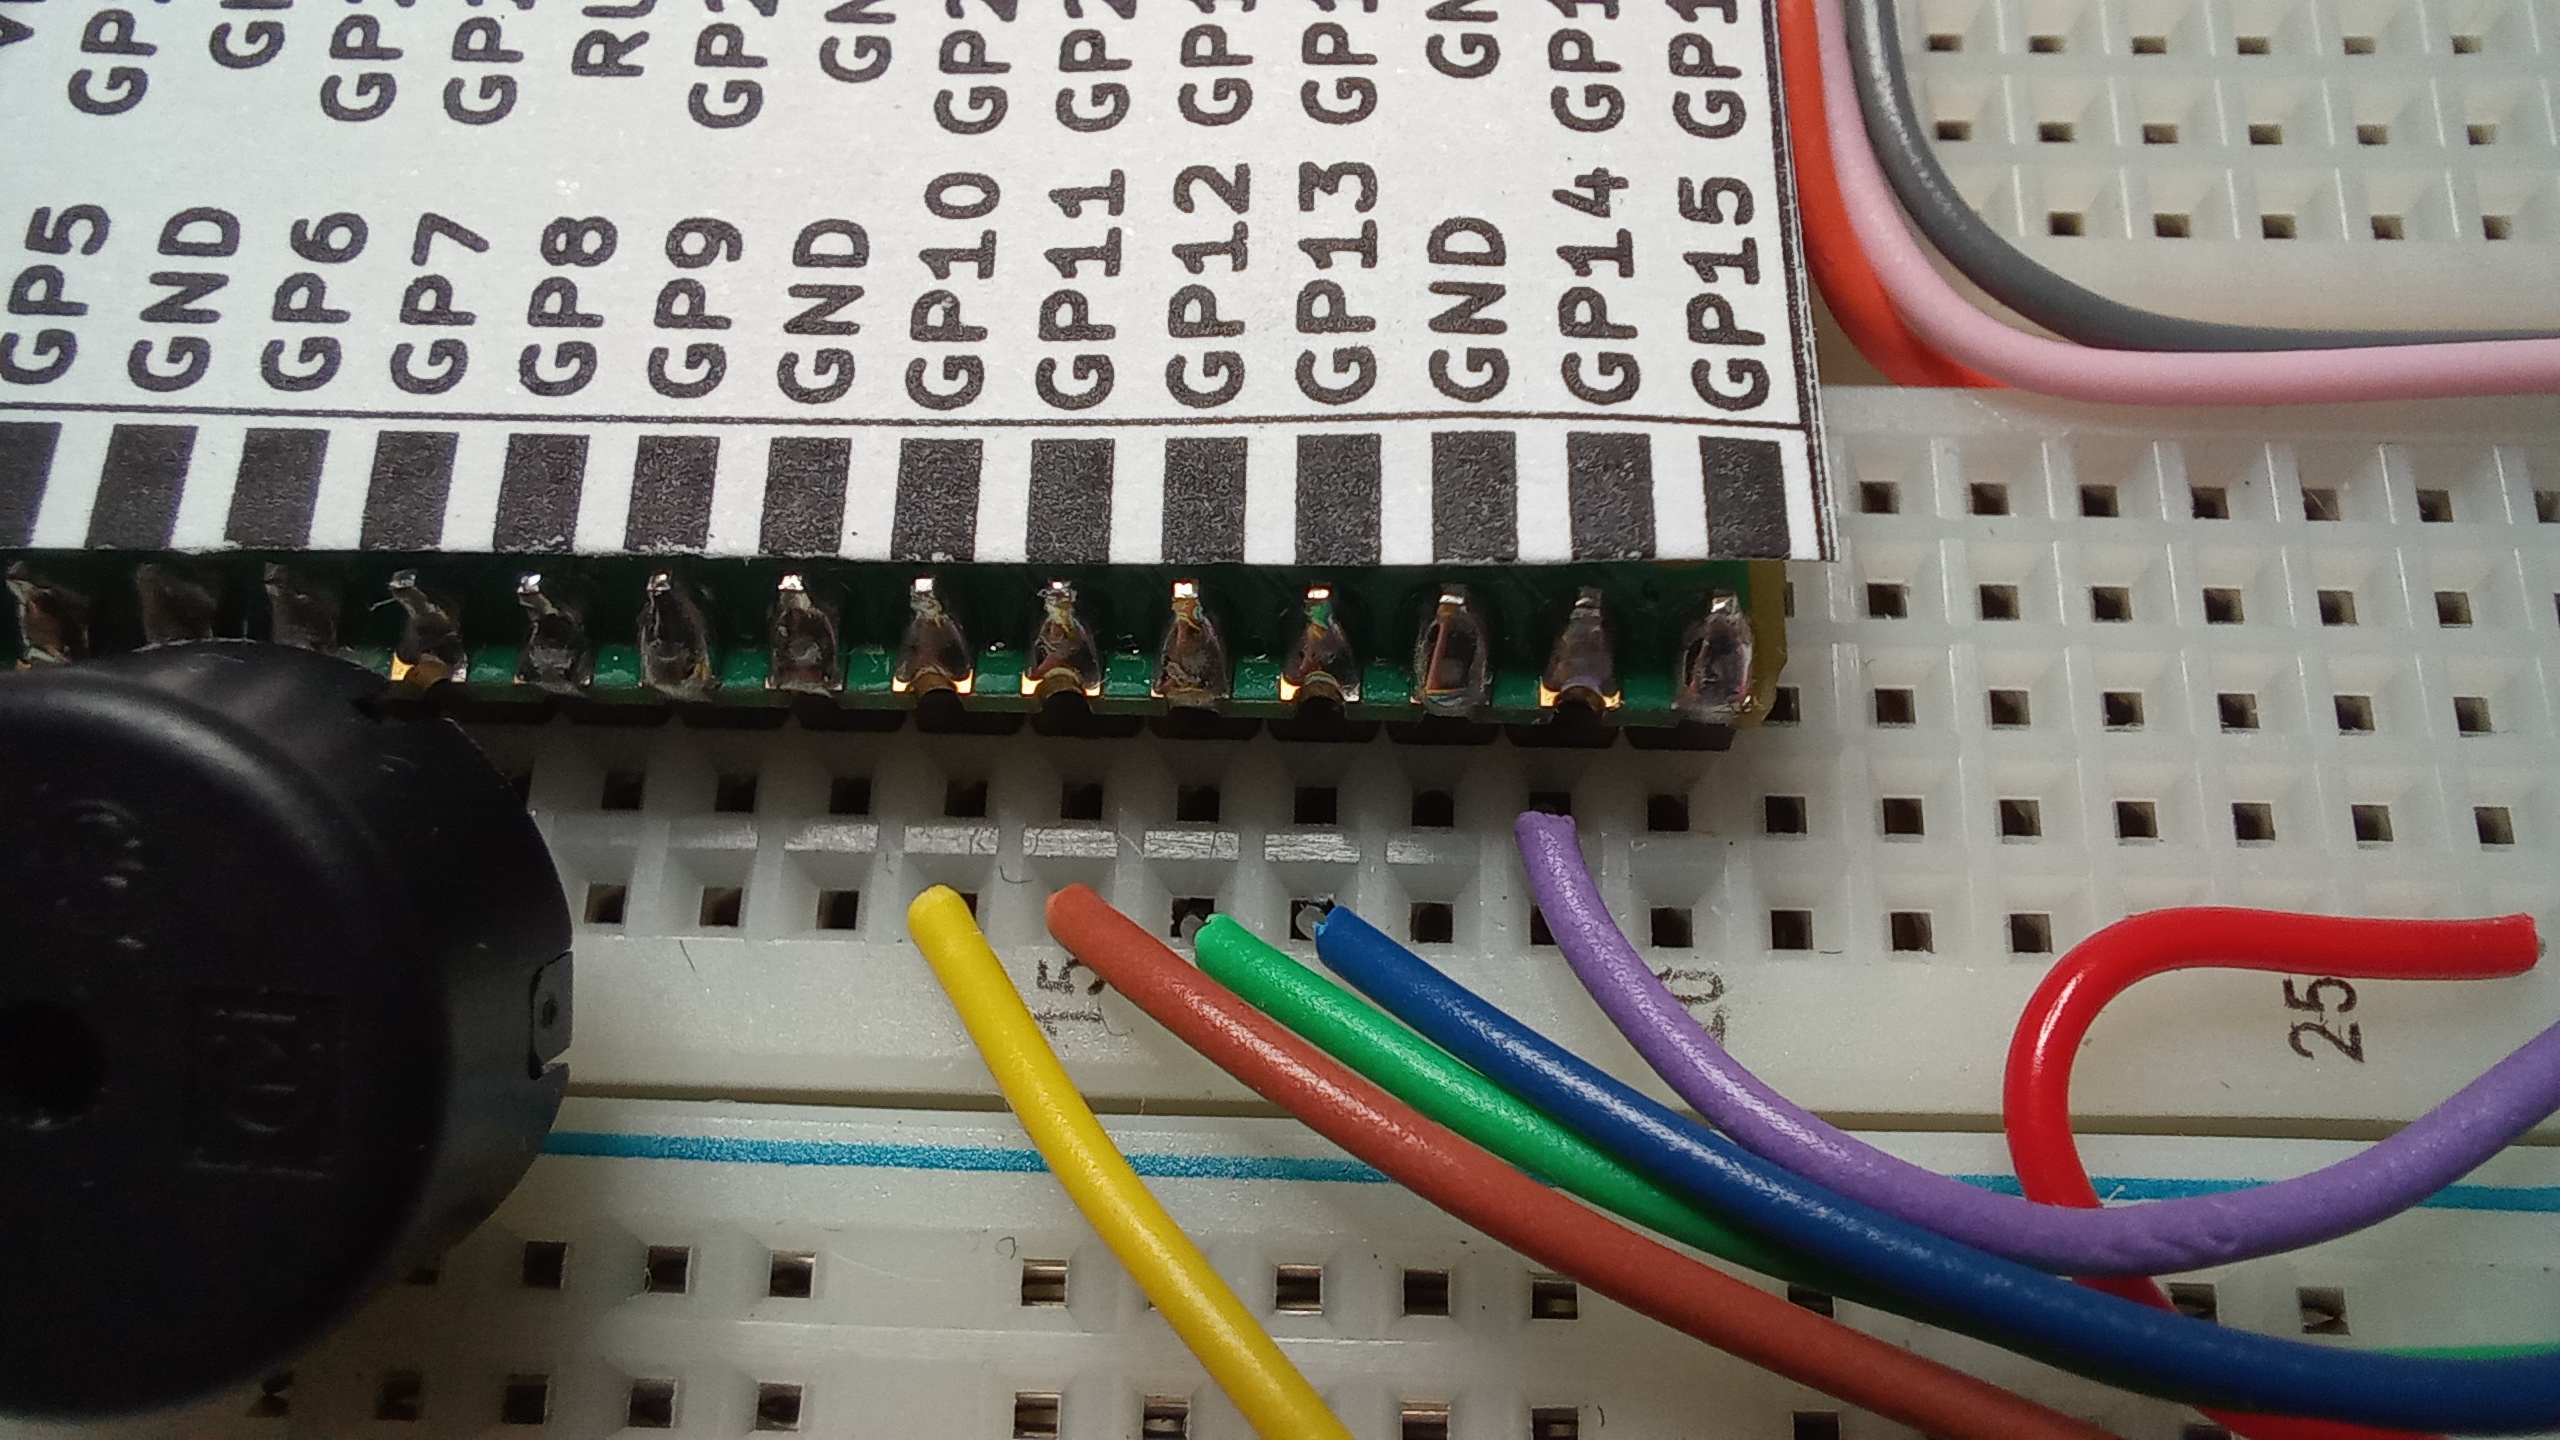
This picture shows the board with the screen removed. Images can be clicked and enlarged to show more detail. There are further close up views of where each wire goes in the pictures below

| Wire color or button | RPI Pico pin |
| Orange | GP16 |
| Grey | GP17 |
| Pink | GP18 |
| White | GP19 |
| Red (long) | 3.3out |
| Blank | GND |
| Left (‘A’) Button | GP20 and GND |
| Right (‘B’) Button | GP26 and GND |

| Wire colour or button | Breadboard hole |
| White | 44 J |
| Orange | 47 H |
| Pink | 44 C |
| Grey | 41 H |
| Gamepad Left | 49G 47G |
| Gamepad Right | 43G 41G |
| Gamepad Up | 46E 44E |
| Gamepad Down | 46 i 44 i |

| Wire colour | Breadboard hole |
| Black | 34 A to hole directly above blue line (GND) |
| Red | 33 A to hole just below the red line (3.3V) |
| Yellow | 32 A |
| Brown | 31 A |
| Green | 30A |
| Blue | 29A |
| Purple | 28A |
| Red | 27A to hole just below the red line (3.3V) |

| Wire colour | RPI Pico pin |
| Yellow | GP10 |
| Brown | GP11 |
| Green | GP12 |
| Blue | GP13 |
| Purple | GP14 |
sdfsd
| Wire colour or speaker | RPI Pico pin |
| Speaker | GP7 and GND |
| Red (long) | Just below red line near breadboard column 6 |
| Black | GND to just above blue line near breadboard column 4 |

Finally, insert the display as shown below. The rightmost pin of the diplay goes into Breadboard pin 27B

When you power up the board you will see a menu that allows you to play various games. Feel free to spend a little while exploring these.
Writing your own code.
Run Thonny and connect it to the board. You will need to configure Thonny’s interpreter first. Go to the Run menu and click “Configure interpreter…”. You will see a dialogue box like this:

The “Port” setting will depend on your computer.
Having done this, press the “Stop” sign in Thonny’s toolbar. This stops the currently running program and allows you interact with the board and try out new programs. Click the menu icon as shown below and create a new file called myprog.py

Insert the following code into this new file
import st7735
import sound
import controller
display=st7735.st7735()
snd=sound.sound()
gamepad=controller.controller()
display.drawLine(0,0,100,10,display.RGBToWord(255,255,0))
display.fillRectangle(10,10,40,50,display.RGBToWord(255,0,255))
display.drawCircle(80,80,30,display.RGBToWord(0,255,255))
beep=sound.note(1000,200,100)
snd.playNote(beep)
print("Press left button")
while(not gamepad.leftPressed()):
    pass
print("Left pressed")
for count in range(0,5):
    display.print(str(count),2,100+count*10,display.RGBToWord(255,255,255),0)
Click the Run button on Thonny’s toolbar and watch and listen to the board.
Functions available in the installed python software
# the display class
st7735:
     putPixel(x,y,colour)
	 drawLine(x0,y0,x1,y1,colour)
     fillRectangle(x1,y1,w,h,colour)
     drawRectangle(x1,y1,w,h,Colour)
     clear()
     putImage(x,y,w,h,img,horiz,vert)
     print(text, x, y, forecolour, backcolour)
     RGBToWord(r,g,b)
     drawCircle(x0,y0,radius,colour)
     fillCircle(x0,y0,radius,colour)
     loadBMP(filename)

# the sound class
class note:
     __init__(frequency,duration,pause):
class sound:
	note(freq,duration,pause)
	playNote( <some note> ) e.g. playNote(sound.note(500,50,0))
    run()    # starts the music system as a background task.  A tune array is contained in the sound object
		     # which can be written to by an application as follows:
		     # sound.tune.append(sound.note(500,50,0))

# the sprite class
class sprite:
    __init__(x,y,w,h,image,display)
     show()
     hide()
     move(newx, newy)
     move_no_erase(newx, newy)
     setOrientation(horiz, vert)
     isOverlapping(sprite2)
     isOverlapping2(sprite2)

# the controller/gamepad class
class controller:
     leftPressed(self)
     rightPressed(self)
     downPressed(self)
     upPressed(self)
     aPressed(self)
     bPressed(self)
     buttonPressed(self)

# A useful menu class
class menu:
    doMenu(display,controller,menulist):
Resources
The micropython language: https://docs.micropython.org/en/latest/
Micropython on the RPI Pico : https://docs.micropython.org/en/latest/rp2/quickref.html
A printable set of labels for the RPI pico (the pin names are on the underside of the device unfortunately).
The code used in the December 2024 workshop
