Instructions
The pictures below should guide you through the assembly process. High resolution (zoomable) versions of the images are available by clicking the link beneath each image. The breadboard is marked in a grid using letters for rows and numbers for columns. Components should be placed in the rows and columns shown in the images. Before you start, make sure the red rail is at the top.
The first step is to add the pre-programmed TIMSP430 microcontroller to the breadboard as shown above. Note the dimple on the microcontroller left side. Make sure the leftmost pins are in column 20.
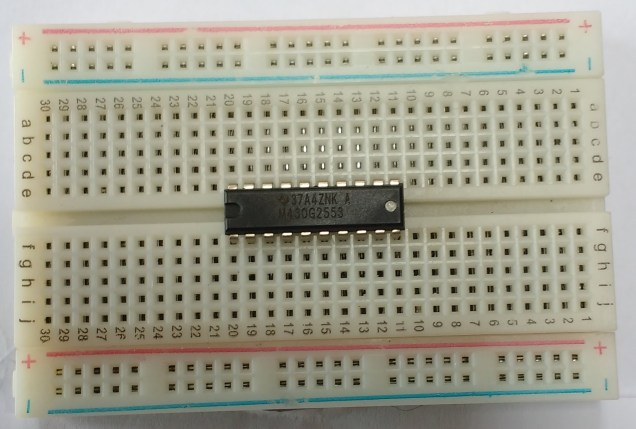
High resolution version of this image
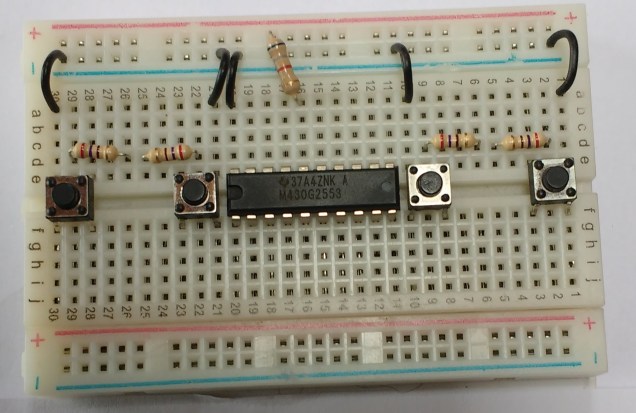
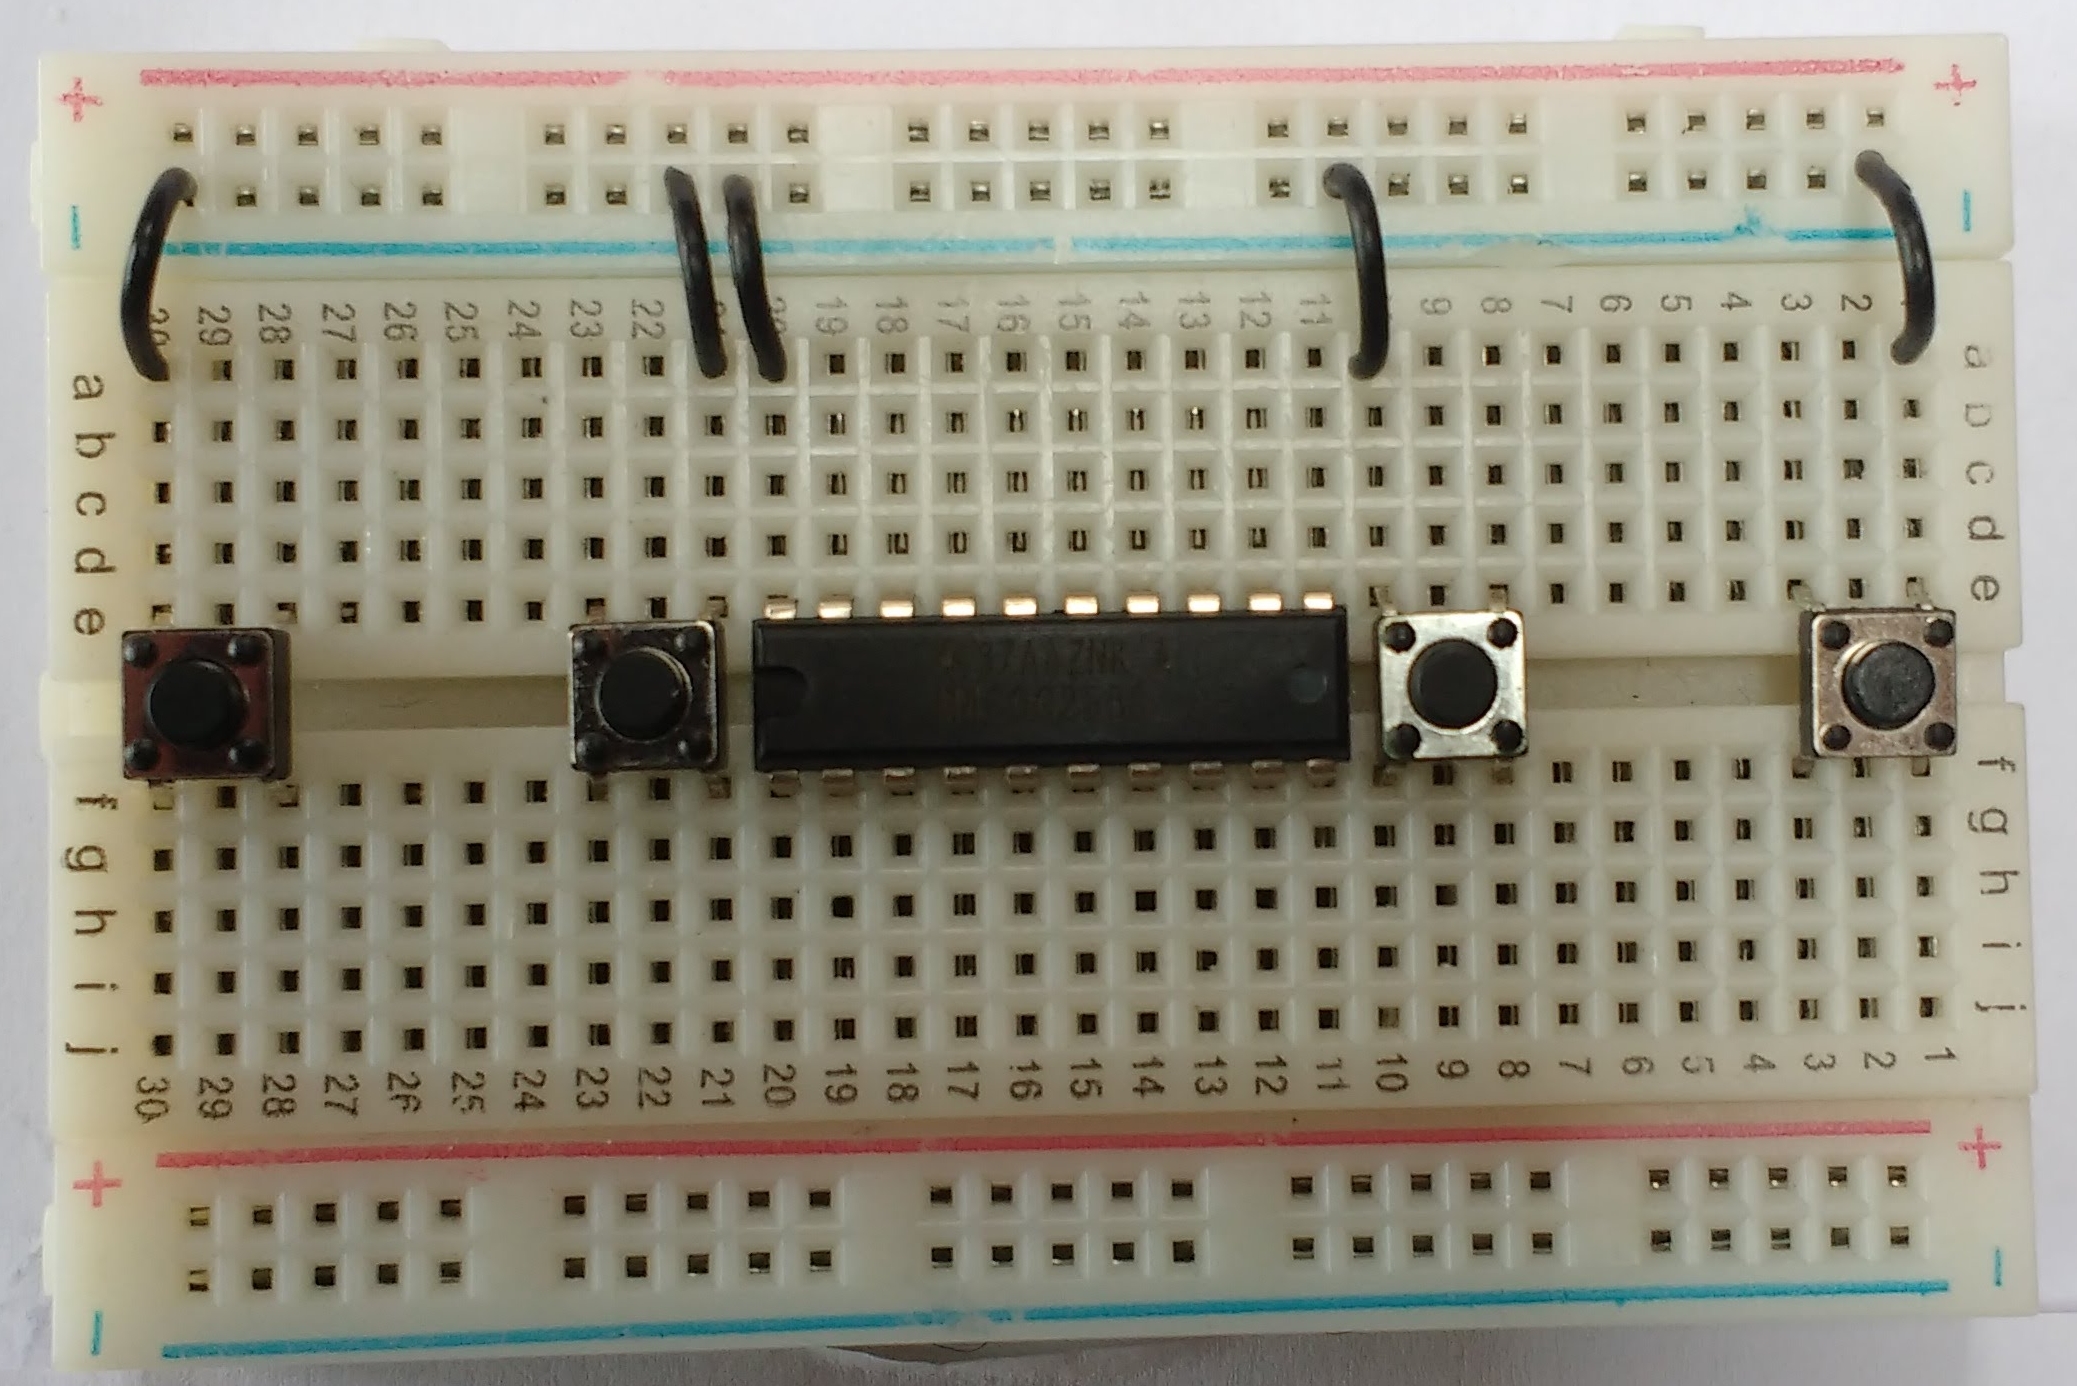
The next step is to add the buttons and 5 short black wires. These wires connect back to the blue rail which is 0V in this circuit.

High resolution version of this image
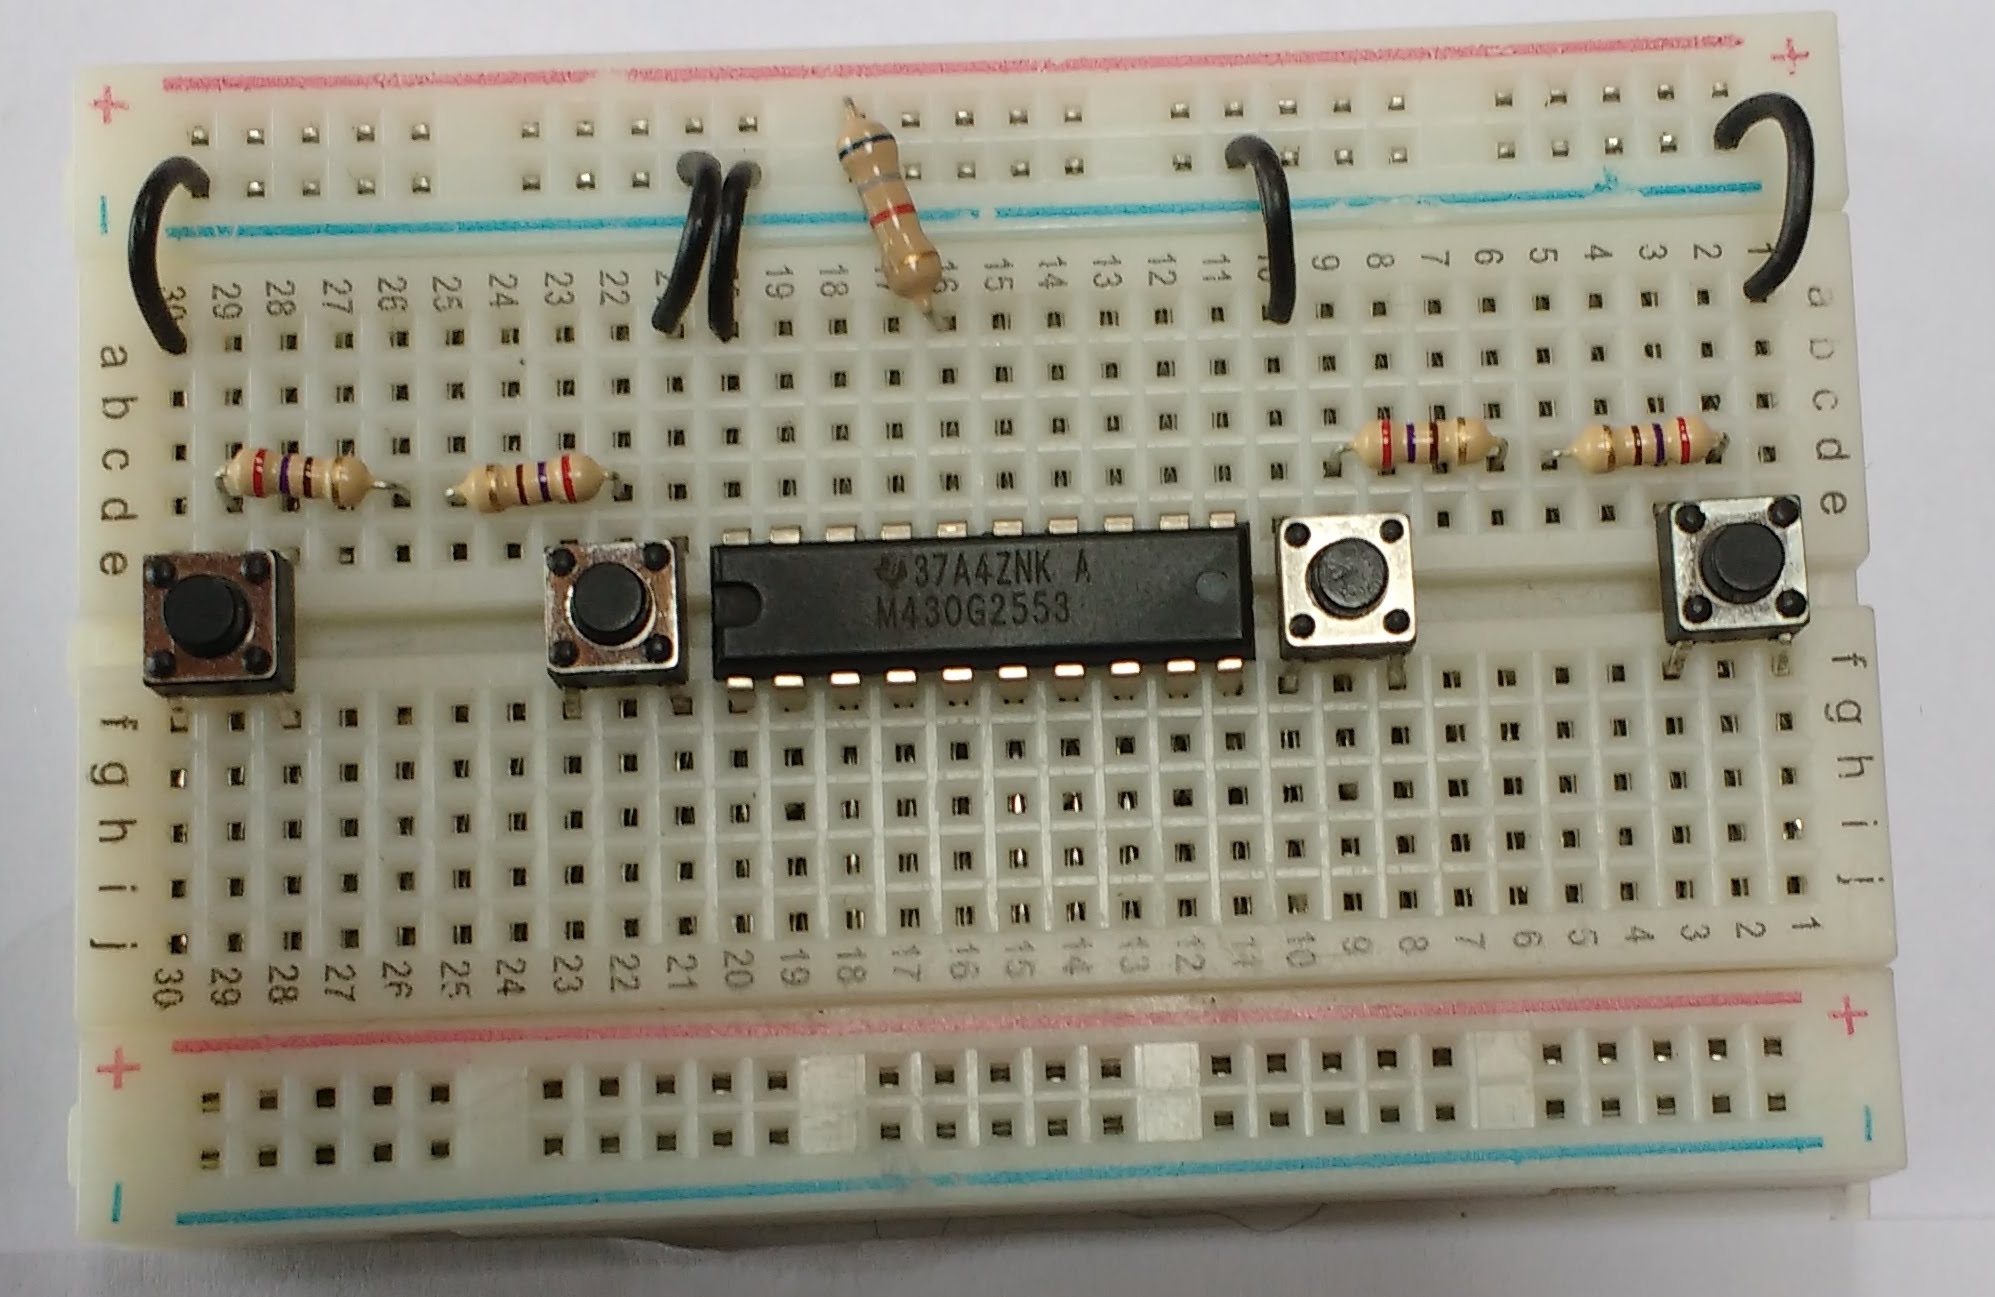
Next, all of the resistors are added. Make sure you follow the colour code as shown in the pictures. Four of these resistors control current flow to the LED’s in the circuit. The fifth resistor is used to take the micro out of it’s reset state when the power is turned on.
High resolution version of this image
The LED’s are added next. Note the colours. The clear one on the right is actually a blue LED. The LED’s will only light up if they are placed the right way around. If you hold the LED up to the light you will see that it looks a little like this inside:

The Cathode side of the LED should connect to the black wires that you placed earlier.

High resolution version of this image
In the next step, you will wire the micro to the resistors using colour coded wires.

High resolution version of this image
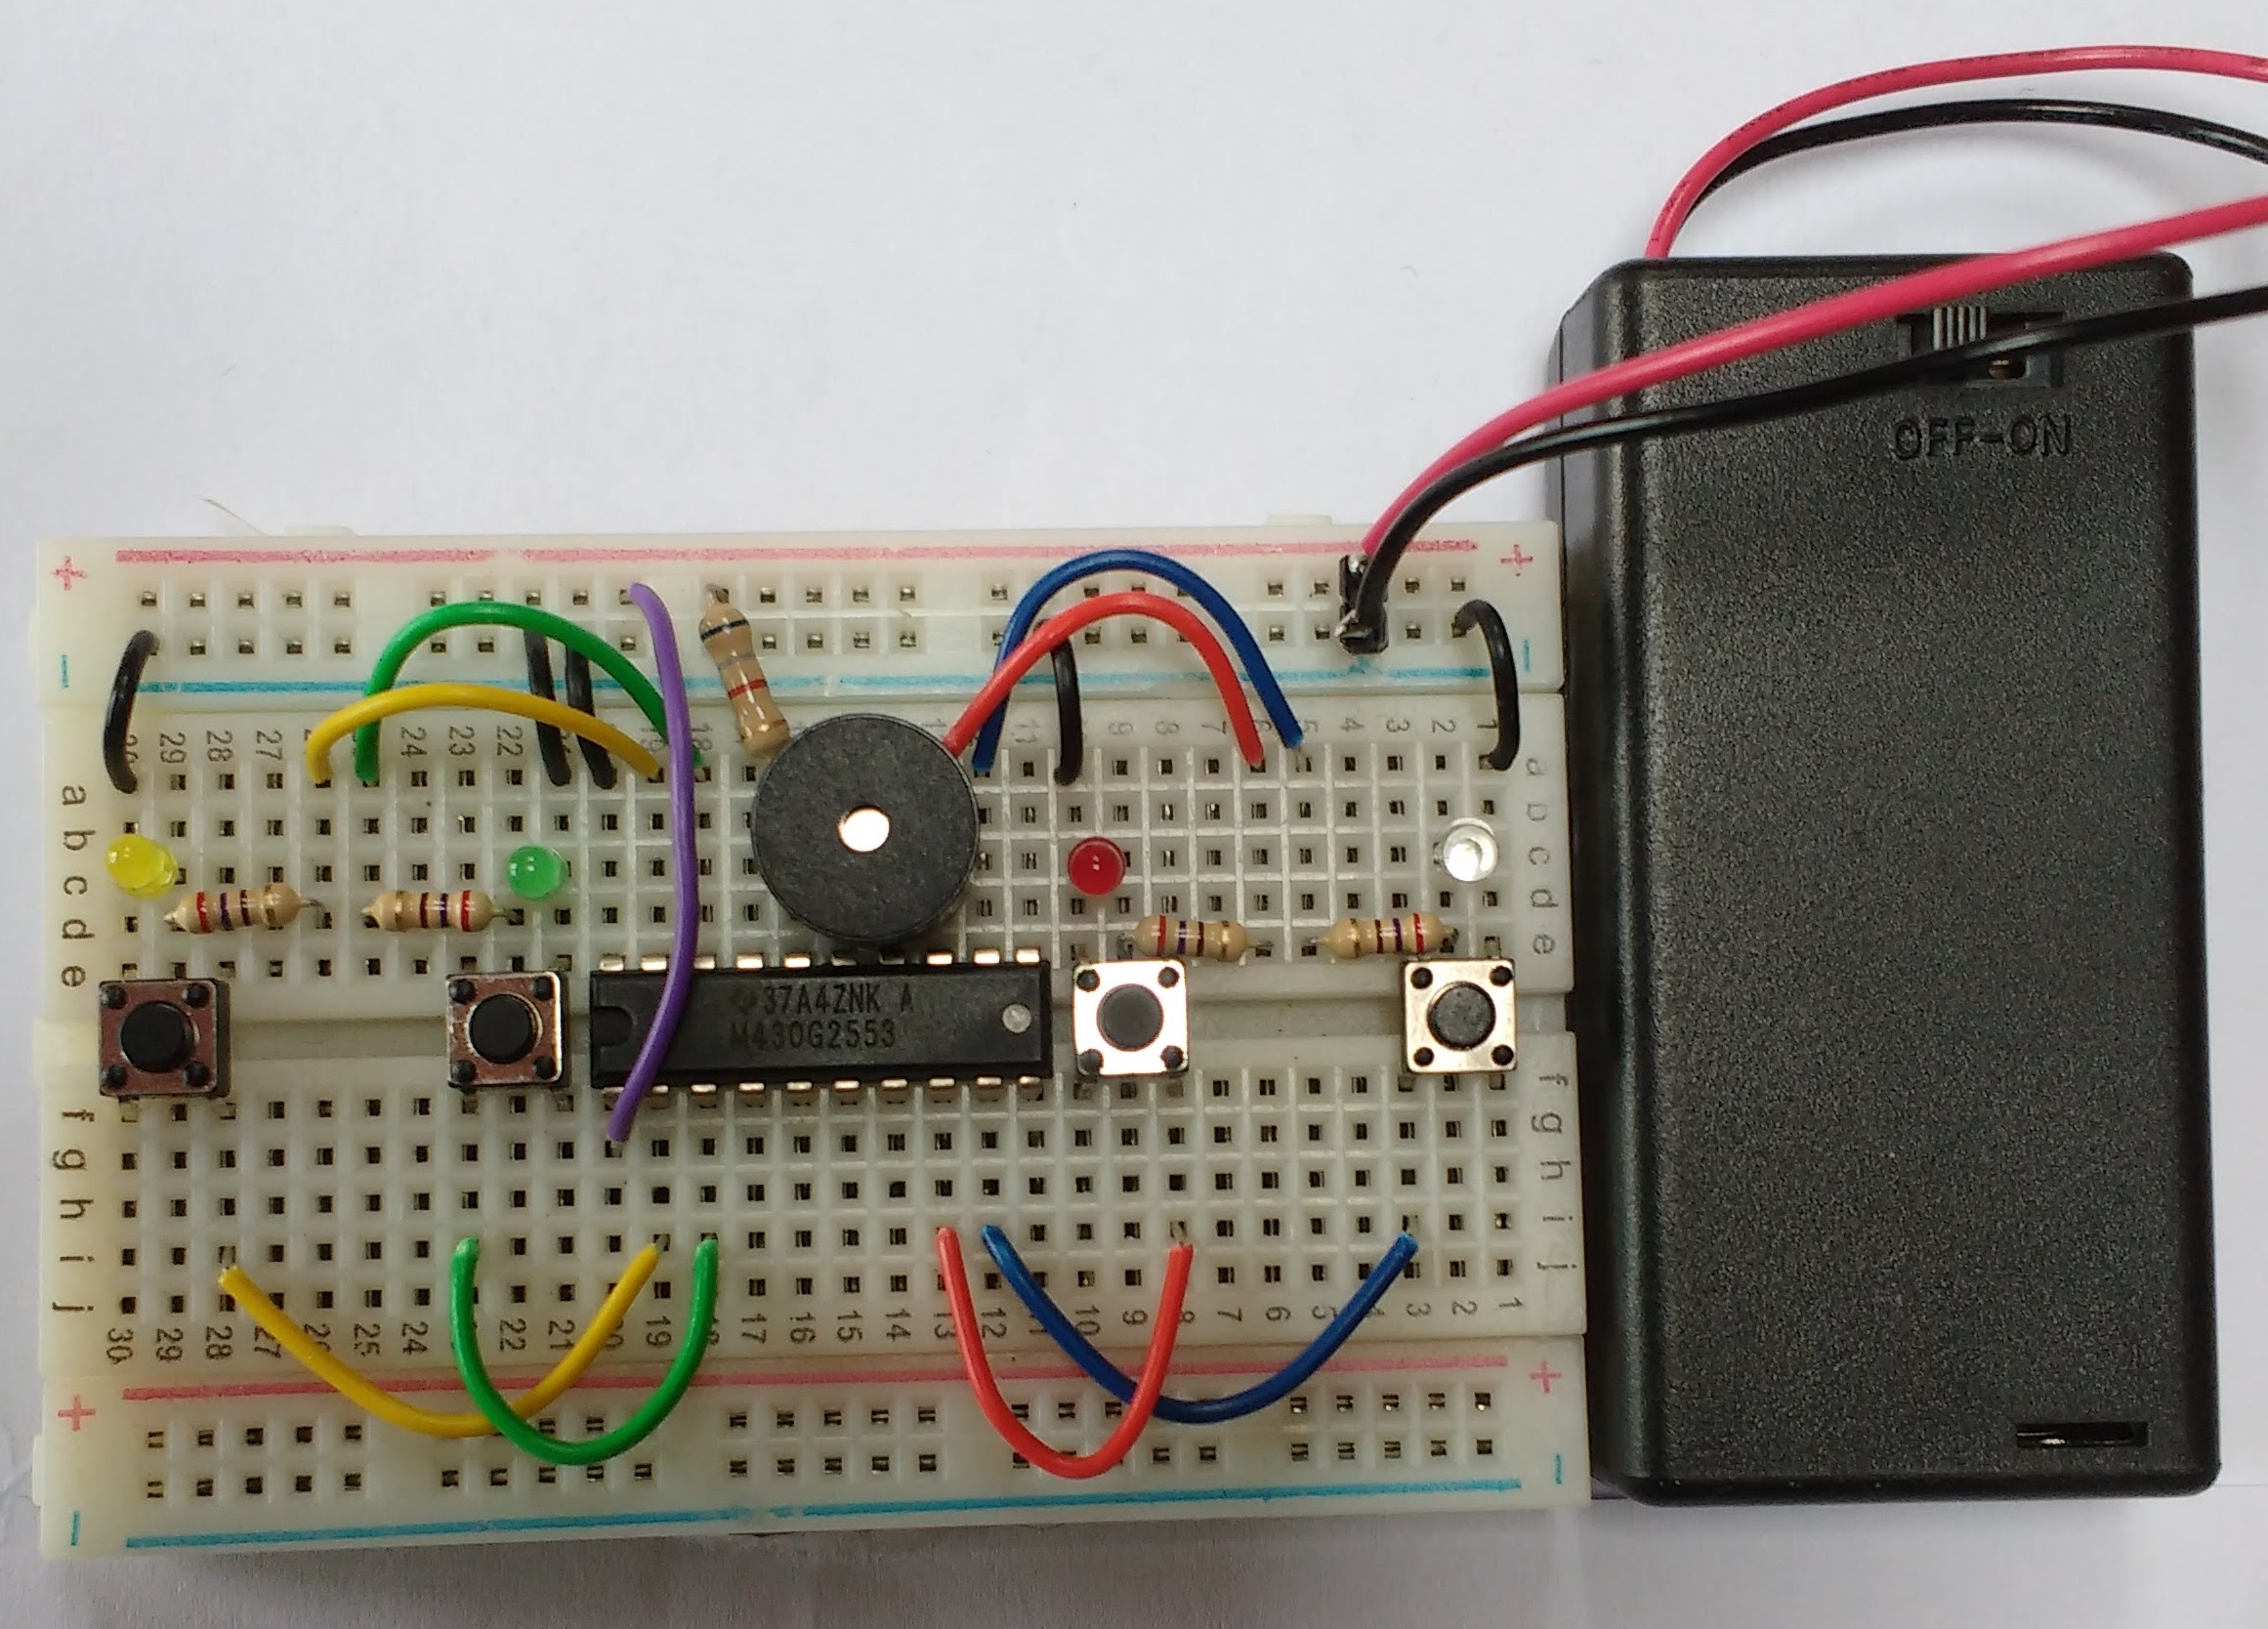
The final step involves two things: The purple wire connects the micro’s power supply pin to the red rail on the top of the board. The second part adds the battery pack to the circuit. Make sure you get this the right way around!

High resolution version of this image
Code
The code for the game was written in Energia. The microcontroller’s speed was reduced from the default 16MHz to 8MHz to allow it operate at lower voltages (this allows it to run for longer on 2 AA batteries). (You need to edit the file platform.txt to do this)
#define MAX_ROUNDS 20
// the setup routine runs once when you press reset:
void setup() {
  // initialize the digital pins as an outputs and inputs
  pinMode(P2_6, OUTPUT);
  pinMode(P2_7, OUTPUT);
  pinMode(P2_5, OUTPUT);
  pinMode(P2_4, OUTPUT);
  pinMode(P1_6, OUTPUT);
  pinMode(P1_7, OUTPUT);
  digitalWrite(P2_6, LOW);
  digitalWrite(P2_7, LOW);
  digitalWrite(P2_5, LOW);
  digitalWrite(P2_4, LOW);
  digitalWrite(P1_6, LOW);
  digitalWrite(P1_7, LOW);
  P1REN |= BIT0 + BIT1; // Turn on pull-up resistors for button inputs
  P1OUT |= BIT0 + BIT1;
  P2REN |= BIT0 + BIT1;
  P2OUT |= BIT0 + BIT1;
}

// the loop routine runs over and over again forever:
void loop() {
  char Sequence[MAX_ROUNDS];  // A place to store tones in a sequence
  int NextNote;
  int Round = 0;
  Intro();
  while (pollButtons()); // wait for user to release button
  delay(200);
  while (1)
  {
    while (Round  0)
      {
        // don't allow same note twice in a row
        while (NextNote == Sequence[Round - 1])
          NextNote = random(1, 5);
      }
      Sequence[Round] = NextNote;
      Round++;
      playSequence(Sequence, Round);
      if (getUserSequence(Sequence, Round) < 0 )
      {
        // User failed to copy correctly
        while (pollButtons()); // wait for user to release button
        while (pollButtons() == 0)
        {
          Red(100);
          Green(100);
        }
        return;
      }
      delay(500);
    }
    // Success!
    while (pollButtons()); // wait for user to release button
    while (pollButtons() == 0)
    {
      Yellow(50);
      Red(50);
      Green(50);
      Blue(50);
    }
    return;
  }
}
void playSequence(char *Seq, int len)
{
  int i;
  for (i = 0; i < len; i++)
  {
    switch (Seq[i]) {
      case 1:
        Yellow(500);
        break;
      case 2:
        Green(500);
        break;
      case 3:
        Red(500);
        break;
      case 4:
        Blue(500);
        break;
    }
    delay(500);
  }
  // Signal the user that it is their turn
  All(50);
  delay(50);
  All(50);
  delay(50);
}
int getUserSequence(char *Seq, int len)
{
  int Count = 0;
  int Btn;
  while (Count < len)
  {
    while (pollButtons() == 0); // wait for press
    Btn = pollButtons();
    if (Btn == 1)
      Yellow(100);
    if (Btn == 2)
      Green(100);
    if (Btn == 3)
      Red(100);
    if (Btn == 4)
      Blue(100);
    if (Btn != Seq[Count])
      return -1;
    while (pollButtons() != 0); // wait for release
    delay(20);
    Count++;
  }
  return 0; // correct sequence entered
}
void Intro()
{
  Red(500);
  Blue(500);
  Green(500);
  Yellow(500);
  All(500);
  delay(500);
  while (pollButtons() == 0)
  {
    All(50);
    delay(50);
  }
}
void Yellow(unsigned Duration)
{
  digitalWrite(P2_6, HIGH);
  tone(P1_6, 174);
  delay(Duration);
  digitalWrite(P2_6, LOW);
  noTone(P1_6);
}
void Green(unsigned Duration)
{
  digitalWrite(P2_7, HIGH);
  tone(P1_6, 349);
  delay(Duration);
  digitalWrite(P2_7, LOW);
  noTone(P1_6);
}
void Red(unsigned Duration)
{
  digitalWrite(P2_5, HIGH);
  tone(P1_6, 392);
  delay(Duration);
  digitalWrite(P2_5, LOW);
  noTone(P1_6);
}
void Blue(unsigned Duration)
{
  digitalWrite(P2_4, HIGH);
  tone(P1_6, 440);
  delay(Duration);
  digitalWrite(P2_4, LOW);
  noTone(P1_6);
}
void All(unsigned Duration)
{
  digitalWrite(P2_7, HIGH);
  digitalWrite(P2_6, HIGH);
  digitalWrite(P2_5, HIGH);
  digitalWrite(P2_4, HIGH);
  tone(P1_6, 261);
  delay(Duration);
  digitalWrite(P2_7, LOW);
  digitalWrite(P2_6, LOW);
  digitalWrite(P2_5, LOW);
  digitalWrite(P2_4, LOW);
  noTone(P1_6);
}
int pollButtons()
{

  // Stir the random number pot
  random(5);
  if (digitalRead(P1_0) == 0) // Yellow
    return 1;
  else if (digitalRead(P1_1) == 0) // Green
    return 2;
  else if (digitalRead(P2_0) == 0) // Red
    return 3;
  else if (digitalRead(P2_1) == 0) // Blue
    return 4;
  else
    return 0;

}
